11 Jul 2026

A new minor release 0.4.28 of RQuantLib arrived on CRAN this evening, has been uploaded to Debian, and is being built for r2u as well.
QuantLib is a rather comprehensice free/open-source library for quantitative finance. RQuantLib connects (some parts of) it to the R environment and language, and has been part of CRAN for nearly twenty-three years (!!) as it was one of the first packages I uploaded to CRAN.
This release of RQuantLib brings a minor update to the calendars for Israel which in QuantLib 1.43 can now use one of three different exchange choices. However, using 'settlement' is now deprecated so we adjusted our code. This came up as we had packaged the 1.43-rc version of the (upcoming) 1.43 release a few days ago, and it is now in testing requiring RQuantLib to catch up. Full details from the NEWS file follow as usual.
Changes in RQuantLib version 0.4.28 (2026-07-10)
Courtesy of my CRANberries, there is also a diffstat report for the this release. As always, more detailed information is on the RQuantLib page. Questions, comments etc should go to the rquantlib-devel mailing list. Issue tickets can be filed at the GitHub repo.
This post by Dirk Eddelbuettel originated on his Thinking inside the box blog. If you like this or other open-source work I do, you can now sponsor me at GitHub.
11 Jul 2026 3:35am GMT
10 Jul 2026

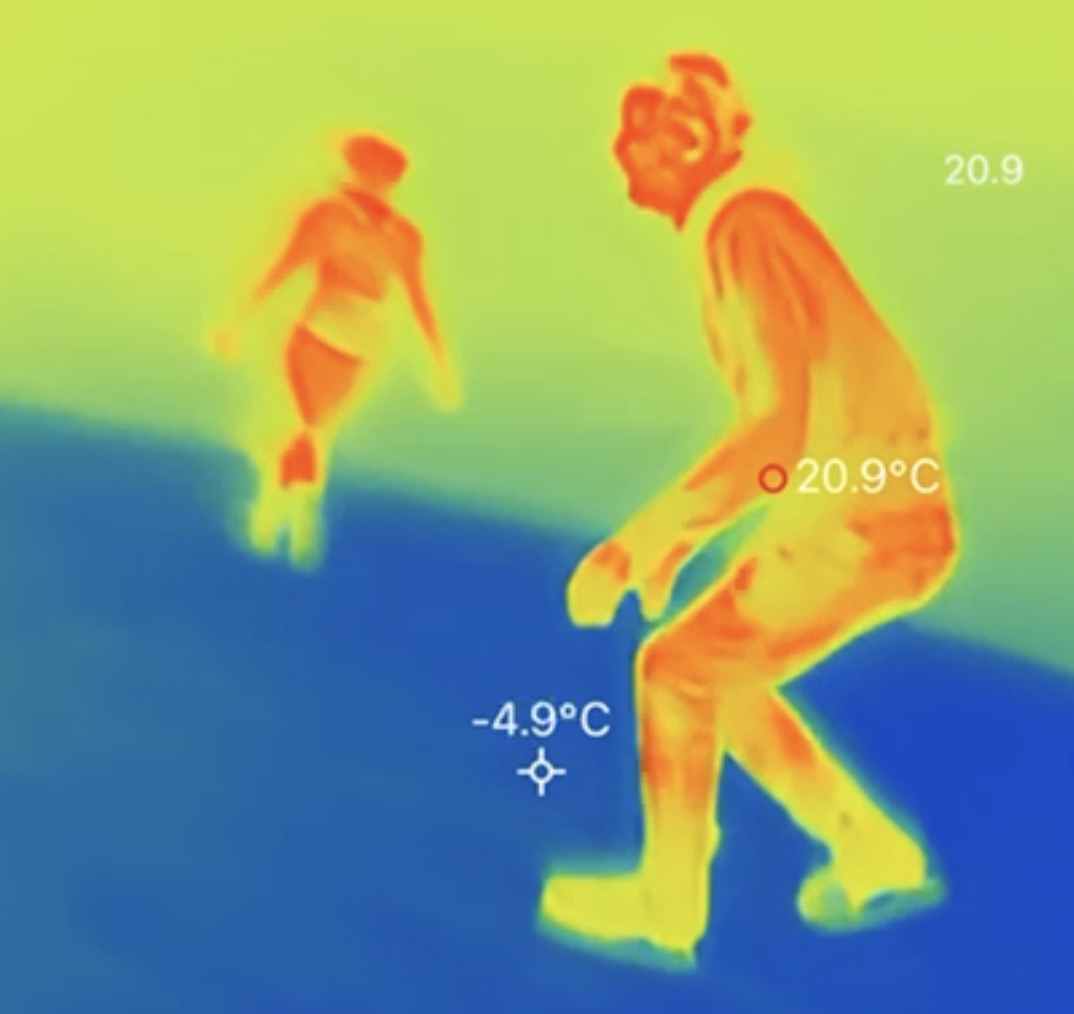
I used to ice skate as a teenager but I stopped at University. I tried to pick it back up in 2024 but had to stop when I got ill. I restarted in 2025, initially with a weekly skate session but last month I started group hockey skate lessons.

There's not a lot of pics of me skating… this one from an IR camera
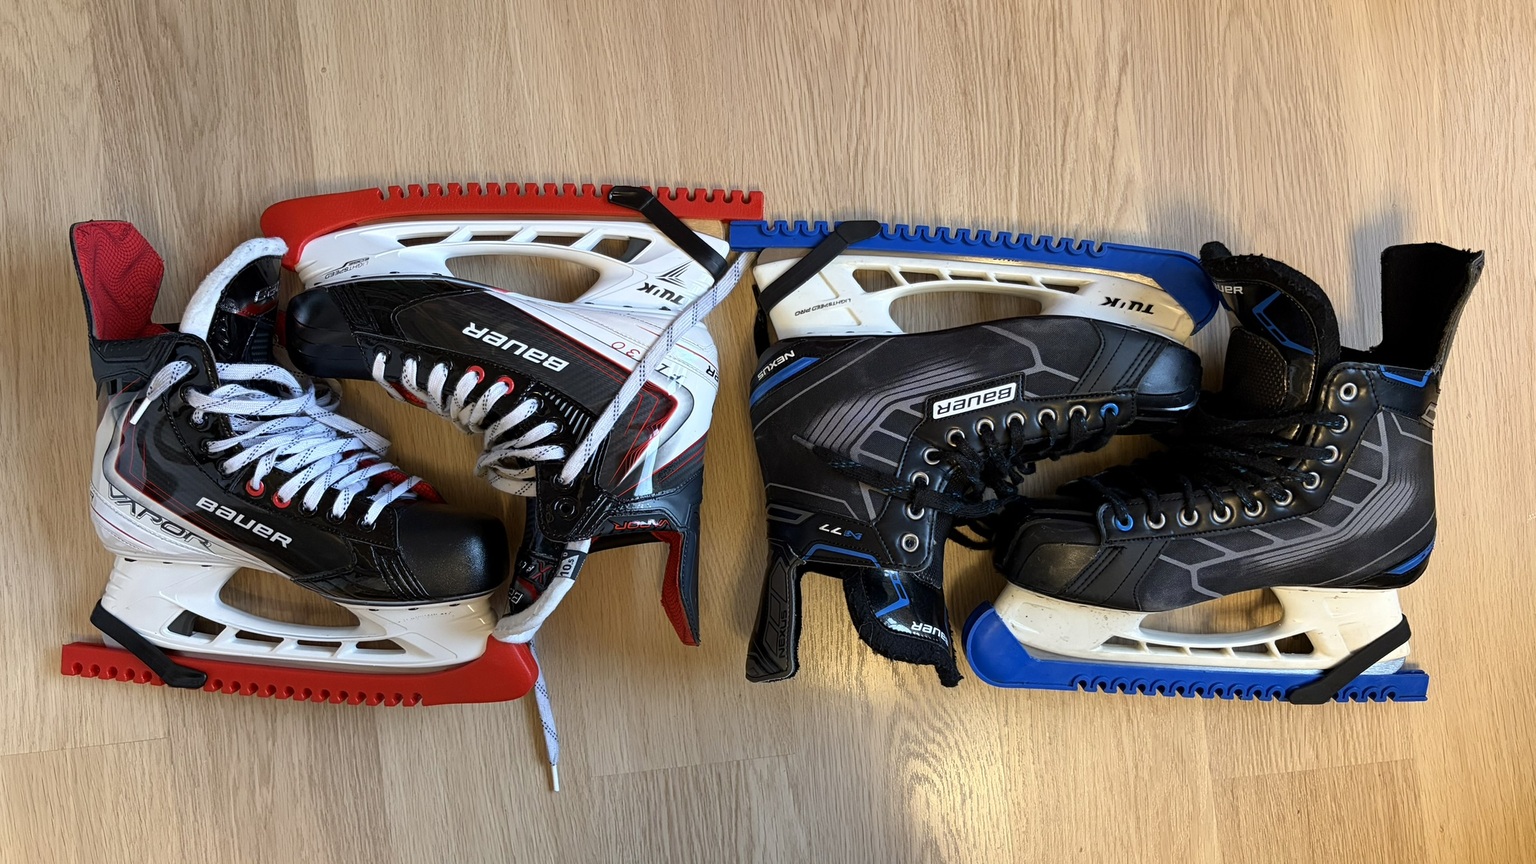
I've been skating in a pair of Bauer1 Nexus N77s that I bought 7 years ago on a work trip to Toronto. These did a great job of getting me back into the hobby for 6 years but recently I felt it was time to step up to a better quality pair. Despite being a size down from my shoe size, the Nexuses are too large: I had been compensating with thick socks but still struggling to get the boots tight enough. I'd have to wear gloves to lace up because I'd cut my hands pulling the laces otherwise.
After too long researching/deliberating/kvetching (very much on trend for me) I upgraded to Bauer Vapor Fly30s another half-size down (and nearly ten times as much). The fit is much better, in almost every respect. They actually go on easier and I don't have to tear my hands tightening the laces. They feel like a natural extension of my feet. I seem to be using a different set of muscles to skate, so the first few sessions were very fatiguing, but that settled. The Vapor line is speed-oriented, which I thought would fit my skate style best.

new and old skates
I have unfortunately gained a common problem: arch pain. More precisely, my navicular bone seems to be quite prominent2, and that part is pressing uncomfortably into the boot. Boots typically take a few sessions to break in, but after 7-8 sessions the pain was getting to the stage that I couldn't skate for a full session without being in agony.
The last time I skated I tried to throw everything at the problem: I'd had the skates baked3; bought some orthotic insoles; then some "Bunga" pads over the sore bit and an attempt to more loosely tie the laces over the affected area. I tried a ten minute skate, and it seemed a bit better.
I then tried experimentally to swap back to my old skates, and I felt like Bambi: I just couldn't do it! They didn't press on the navicular, and they're softer so you can compensate for the size with tight lacing, but I had no confidence in them, I couldn't lean into the turns. They just felt weird. I realised there's no way back.
I switched back to the fly30s, adjusted the bunga pad positioning, tweaked the lacing and went back on for about 40 minutes. It went well: the rink was quiet, it was cool whilst we had a heat wave outside, so I worked up a sweat. By the end there was some discomfort, but not too much, and I think partly the area is currently sensitive so just about anything will cause discomfort. Fingers (or toes) crossed that I've mitigated the problem! If not, it might be time to try a punch out.
10 Jul 2026 8:57pm GMT
"You are what you eat" - but perhaps this is even more true of our information diet. It is hard to strike a balance between remaining a well-informed citizen versus spending hours ingesting unnecessary news about issues and events we can't affect. But I'm increasingly convinced that my hours lost to doomscrolling are down to design choices by web publishers rather than a failure of individual willpower.
We have created an "obesogenic" information environment
I don't think it is just me - I think our information environment has been progressively altered over time as news sites look to maximize engagement. Even outside of social media, the invisible hand of the market for eyeballs forces sites to optimize for browse time or risk irrelevance.
Even as newspapers find it increasingly difficult to fund good journalism through advertising in an online world, especially local journalism, they need to keep readers on their sites, clicking through as many articles as possible. Clickbait headlines, "urgent" flashing live icons to draw the attention, and many opportunities to leap from one article to another, and another.
But this design approach even extends to news organisations with a different funding model, like BBC News, which is a public service (state-owned but arms-length) organisation funded through a mandatory television licence - a matter of controversy in some quarters. And it extends even to sites where I pay a subscription fee; I might get adverts removed, but I am still bombarded with the same design philosophy; too many opportunities to be pulled away from what I'm reading towards some other unrelated article.
Even if I try and limit my exposure to algorithmic "discovery" of new news, via RSS feeds or similar, if I'm reading the full article in a browser then I am prompted to read more stuff that I didn't intend. This defeats the benefit of curating a set of feeds, because you still get dragged away to random articles.
Only 44% of BBC News is news
To show you what I mean, I'm going to pick on the BBC, although I love them dearly and the same issue very much applies elsewhere.
I've taken a screenshot of a random BBC News article in mobile view (my preferred doomscrolling user access device), and measured approximately what proportion of the full length of the page is taken up by each section. This is a fairly in-depth news article, so I reckon if anything the figures would be worse than this on shorter articles.

(These numbers will not sum to 100% for reasons which are obvious if you look at the crossbars. Also they're approximations.)
Less than half of the page (44% if you exclude the inline related links) is actual news text/images; the rest are links trying to help you find the next thing to read/watch. I do not want this.
I'm sure this A/B tests well in terms of reader figures, but it sometimes leaves me exhausted - it must take subconscious mental energy to ignore, or I spend too much time trying to keep on top of things.
And remember, this is a publicly-funded site that does not rely on advertising!
Blocking out the noise
If you are technically-minded, you can use an ad-blocker such as uBlock Origin to take back some control. Applying the following lines as a custom filter (Settings > My filters) brutally cuts out almost all of these links:
bbc.co.uk##aside
bbc.co.uk##footer>div:has(h2)
bbc.co.uk##[data-block="uploaderEmbed"]
bbc.co.uk##[data-block="links"]
Caveat emptor: I have not road-tested this for more than half an hour, so who knows what consequences this could have on your web browsing. In particular, international readers outside the UK will likely be redirected to bbc.com, the commercial arm of the BBC, where these rules will need adapting.
Is it unethical to use an ad-blocker to remove these links? I would argue not. I am not depriving the BBC of any revenue, because I pay my licence fee. I might reduce the amount of time I spend on their website, but if anything the subjectively better experience might encourage me to consume more news from them, not less. In other circumstances (outside the UK for instance, where the BBC relies on advertising), the balance might be different.
Product managers, please find better metrics
I lament the state of the internet in 2026. I now can't unsee these innocuous "related stories" links as a mechanism to grab my attention, and it's gone too far.
If you are a normal person just browsing the news and looking to discover the latest important stories relatively quickly, I can see that these types of links might actually be useful for discovery; but I'm actually reasonably sure that I'm not going to miss out on anything major. You still have the option of the news home page if you want to be presented with more news for example, and it feels natural to go back to there when you've run out of stories to consume.
But it shouldn't be down to individual responsibility to ignore or geekily block these types of link; news sites with alternative funding models should find better metrics for engagement than "hours spent on site" - how about optimizing for customer mental wellbeing, or minimizing time required to catch up with the news? There's no need to maximize clicks and eyeballs. This is a societal level issue, because we are all going mad with news over-engagement.
Product managers, over to you.
10 Jul 2026 3:00pm GMT
 July already. Wow. It's getting to be a summer.
10 Jul 2026 9:04am GMT

The following contributors got their Debian Developer accounts in the last two months:
- Vivek K J (vivek)
- Benjamin Somers (bensmrs)
- Colin King (colinianking)
- Nadzeya Hutsko (nadzeya)
The following contributors were added as Debian Maintainers in the last two months:
- Pieter Lenaerts
- Syed Shahrukh Hussain
- Ural Tunaboyu
Congratulations!
10 Jul 2026 7:00am GMT

Earlier this year, I made myself a new hat (it will be blogged), and I wanted to put a nice cockade on it. So, I looked for suitable ribbons, and couldn't find any. I found some ribbon that looked passable, but the colours I wanted weren't available, so I set up the website to notify me, and kept working on the hat.
Eventually the hat was done, the ribbon was still not available, so I decorated the hat with fake flowers from my stash, and started wearing it.
And that's when I got notified that the ribbon was back in stock.
By the time the ribbon arrived, I had decided that the hat looked better with the flowers, and project cockade was put on hold, possibly for a future hat.
And then June came, and what could be a better time than that for a project based on flag colours?
As I feared, the ribbon I got wasn't the best: it was a bit too stiff and plasticy, and not really usable for many other things. It did however work well enough for a cockade, and I decided it was a good chance to try different methods and designs, and then make another one to take pictures and publish step-by-step instructions.
And that's the perfect recipe to find oneself surrounded by a somewhat unreasonable number of very similar cockades, I guess.

I looked around for instructions, and the ones that gave a result that was closer to my mental idea of a cockade were the ones by American Duchess, so on my first attempt I tried to follow those.
I didn't have a cork board with a hole, so it was a bit fiddly, and the result was passable, but could have been better. Meanwhile I saw a forum post commenting on the above tutorial and that gave me ideas for a procedure more suitable to the tools I had.

The second cockade I made was indeed more satisfactory, and I also started to experiment with making a center piece with ribbons, to cut down on the types of materials needed.
On this one I also tried to add a pin backing, so that I could write instructions on how to do it in what I believe is a more stable way than simply adding it to the felt backing at the end.
I'm not sure whether the other ones will be tacked to a hat, and thus won't require pins at all, or if I'll just put them on some dress with pins hidden under the ribbon layers.

And then I was ready to make a third cockade, taking step by step pictures for my website, and I planned to start on it the next morning.
Trenord had different ideas.
Thanks to the combination of independent but complete disruptions on two nearby train lines, I spent the morning driving a couple of people to the nearest station that was still being served by trains, and then back home less than 10 minutes before I had to start working, which if you ask me was pretty homophobic of the train company.
There was way less traffic than I expected, and I did enjoy the drive , but for various reasons it meant a significant delay for this post.
Anyway, less than a week later than I had planned, halfway in June I managed to publish step by step instructions on my website, but I wasn't done with the project yet.
Beside the fact that I still needed to finish sewing the backing felt to the cockades I had done, I also had a few ideas for more centrepieces made of ribbon I wanted to try.
And this means that I moved on to another project that was already in progress (this one will also be blogged).

After I've finished that one, at the very end of June I quickly made the last two centrepieces, taking pictures for the instructions, and in the next few days I also finished the cockades.

This time, instead of plain pleats I tried to use box pleats, and I quite like the look they give, so if in the future I'll have a need for more cockades I may use again this pleating pattern.

For the last cockade I wanted to try two things: putting a pin in the middle as a centrepiece, and gathering the ribbons.
For the pin, I found that the only one I had that had a colour scheme compatible with the ribbons I had was one with the penguin from linux.it, which had a black background, so I put black ribbon on the outside and white next to it for contrast.
And gathering was done with a whipped gather with ribbons that were one and a half times the outer circumference of their slot, and looks decent enough, but I think I prefer the look of pleated cockades a lot. Maybe it would look better with a softer ribbon.
Anyway, I think this is plenty of cockades for the time being, unless I get tempted by buying more colours of ribbon to make different ones. But I'm not making an online purchase just for those. I am not.
10 Jul 2026 12:00am GMT
The diffoscope maintainers are pleased to announce the release of diffoscope version 324. This version includes the following changes:
[ Paul Spooren ]
* Allow trailing garbage in Gzip files.

[ Chris Lamb ]
* Bump debhelper compatibility level to 14.
You find out more by visiting the project homepage.
10 Jul 2026 12:00am GMT
09 Jul 2026
I bought a new synth! Kind-of.
I've traded my Minilogue-XD (full-size version with integrated keyboard) for the desktop/modular alternative.

Modular Minilogue XD
Why? Partly, because it fits on my desk better. Partly, because it changes the way you engage with the instrument. It makes a huge difference: the ivory keys come with so much cultural precedent. The module version of the synth gains a switch that lets you use the 16 sequencer step buttons as note inputs, so you can still play the thing solo. But the emphasis moves away from note generation and more firmly towards tone.
Both versions have a lovely stained wood back, which you never see; the modular one has a hint of that at the front as well (which you do see).
I plan to eventually buy a MIDI keyboard that could drive it, and other things: possibly an Arturia KeyStep or Minilab, but there's no rush on that.
(It's about time I recorded and shared something I produced on this)
09 Jul 2026 7:31pm GMT
07 Jul 2026
Debian LTS/ELTS
This was my hundred-forty-fourth month that I did some work for the Debian LTS initiative, started by Raphael Hertzog at Freexian.
During my allocated time I uploaded or worked on:
- [DLA 4615-1] exim4 security update to fix one CVE related to information disclosure in combination with proxies.
- [DLA 4616-1] haveged security update to fix one CVE related to local root privilege escalation.
- [DLA 4618-1] gsasl security update to fix one CVE related to denial of service.
- [DLA 4631-1] asterisk security update to fix 13 CVEs related to buffer under- or overflows, either on heap or on stack. Some are related to use-after-free or wrong processing of invalid or untrusted certificates.
- [ELA-1747-1] gimp security update to fix three CVEs in Buster related to denial of service or execution of arbitrary code if malformed PSP, JPEG 2000 or PSD files are opened.
- [ELA-1748-1] gimp security update to fix two CVEs in Stretch related to denial of service or execution of arbitrary code if malformed PSP or PSD files are opened.
- [ELA-1749-1] exim4 security update to fix one CVEs in Buster and Stretch related to information disclosure in combination with proxies.
- [ELA-1750-1] gsasl security update to fix one CVEs in Buster and Stretch related to denial of service.
Besides fixing all CVEs of asterisk in Bullseye, I started to look at asterisk in other releases as well. Rather surprisingly asterisk is only part of Unstable and Bullseye. All other releases don't include any version of asterisk at all. So first things first, besides some security related RC bugs, asterisk did not migrate due to RC-bugs in dahdi-linux. As I maintain osmocom-dahdi-linux (which supports less/other hardware), I looked at the open issues and after some rounds I could upload a new upstream version, fixed some bugs and resolved issues with piuparts. dahdi-linux meanwhile migrated to testing, job done!
As a next step I looked at the open CVEs. Some of them had been already fixed in previous uploads but had not been marked accordingly. So I fixed all remaining ones and sent a debdiff to the maintainer. Unfortunately there was some kind of overlap in our work and he ignored my debdiff but uploaded a new upstream version. Anyway, job done as well, no open security issues anymore. The only thing that hinders asterisk from migrating to testing is the reproducible build. So if anybody has some spare time …
Other things I worked on were the regression update of rsync. Some of the elven new patches need to be backported, but I am confidentially to finish this month. I already reviewed the rsync- uploads of Sylvain to Buster and Stretch, so I don't expect any big hurdles here. I am also making progress to find the correct patches for hplip and cups.
Debian Printing
This month I uploaded a new upstream versions:
- … hplip to unstable to fix some bugs.
This work is generously funded by Freexian!
Debian Lomiri
This month new upstream versions of dozens of lomiri packages have been released and I uploaded lots of them to Debian. After they migrate to testing, I am also going to sync them to the Ubuntu PPA.
This work is generously funded by Fre(i)e Software GmbH!
Debian Astro
This month I uploaded a new upstream version or a bugfix version of:
- … indi-pentax to unstable. This is a package in contrib without autobuild and needed a new upload for the libraw transistion.
- … c-munipack to unstable.
- … supernovas to unstable (sponsored upload).
Debian IoT
This month I uploaded a new upstream version or a bugfix version of:
Debian Mobcom
This month I uploaded a new upstream version or a bugfix version of:
misc
This month I uploaded a new upstream version or a bugfix version of:
- … visam to unstable. There had been an RC bug due to two binaries with the same name but different functionality. Yes, it is in the policy but … (my mother forbade me to elaborate more on this)
- … mailio to unstable.
07 Jul 2026 5:56pm GMT
06 Jul 2026

Taking a good group photo consists of multiple aspects:
- hardware
- scouting
- organization
- preparation
- execution
- processing
- publishing
I can say with confidence that nearly everything here comes from having failed to do these things right at least once, even on the latest attempts, so this is an ideal to reach towards, not something we expect to hit every time.
The Goal
The main goal of a big event group photo is capture both the moment itself and each individual person inside that moment.
We want people, who were not there to see all the people involved and get an impression of what it was like being there. It needs to show the breadth and depth of people that make up this group, this project.
And we want people who were there to be able to look back the next week, the next year or in ten years and remember - ah, yes, I was there, I was standing right there with this grin on my face next to this wonderful person and I was feeling great.
Hardware
Based on the goal we want to have high level photographic gear that is able to capture both a broad enough picture to encompass all the people and some of their surroundings to communicate the context (without undue distortions) and to deliver enough detail and resolution so that faces and facial expressions and underlying feelings of every single person in that group could be clearly seen and preserved.
To both capture the context and minimise distortion the final picture should be just a bit wider than normal human field of view. That is about 50mm for a full-frame camera or 35mm for a typical 1.6 crop camera. You can go a bit wider if there are no better alternatives (as detailed in the scouting section), but be prepared that corners of the image will be distorted and not really usable (but we can fix that in processing step). Or you can go to unusual aspect ratios, like we did in Debconf 10.
In the absence of a 100MP+ camera, you will need to be stitching together multiple frames to achieve resolution high enough to have enough pixels-per-face to see emotions clearly. This means that the photos you will actually be taking will be tighter than the overall field of view mentioned above. Still, a higher resolution camera body is preferable - nowadays 24MP-32MP cameras APS-C provide a good compromise between resolution and price, but 45-67MP full-frame cameras also exist on the market. Assume that we will be shooting in a bright environment, so most likely with quite low ISO settings, that means that high-ISO noise characteristics of more expensive cameras will not really play a role here. You will also not need very fast burst modes, even manual speed of one frame per second is sufficient.
You will also want to get as much detail as possible out of your lens, and this is the most important part. You can do amazing work in all other steps of the process and have a great camera too, but if you pair it with a lens that is not sharp, then the end result will be disappointing.
You want the lens that is sharpest corner-to-corner when stepped down to about f/8-f/11, that you can get for your system. You also want that lens to be about 85mm full-size sensor or 50mm for 1.6 crop size. Luckily that kind of range is also a great range for optical design and sharpest lenses are typically available in exactly these kinds of sizes. You absolutely want to have a fixed focal length lens, not a zoom lens. Even profession grade zoom lenses often deliver worse image quality compared to fixed lenses that cost less 1/10th of their price (when shooting in the same focal length). Newer design lenses are better than older lenses - optical design, coatings and precision manufacturing have advanced a lot over the decades. Retro look is great for mood, but not as good for actual resolution and clarity. You don't need to overpay for most expensive lenses because those often only improve image quality on lower F-stops. To encompass the whole group we will need to shoot at f/8 and in bright light, so the extra benefits of those f/1.2-capable super expensive lenses will not come into play here.
We will have no use for a flash here. A tripod will be too restrictive when rapidly repositioning the camera between different parts of the panorama shoot. But a monopod might help with stability - I have not tried that myself, however.
For my last photos I used a Canon EOS R7 (32.5MP) with Canon RF 50mm f/1.8 STM lens and considering an upgrade to Sigma 56mm f/1.4 DC DN for the next time.
Scouting
Scouting a good location for the group photo is another big chunk of a successful picture. The critical piece of the puzzle is lens-to-face distance. In order to keep everyone's face in-focus and have enough resolution on the farthest faces (without making nearest faces truly massive) we want to do everything possible to reduce the variance in lens-to-face distance - to reduce the difference in distance between closest and farthest face.
The most effective way to do that is to have the photographer climb higher. To see this in action on the Debconf photos, compare Debconf6 (very high camera position, group on level ground - good) to Debconf10 (camera not too high, group on stairs, still good) and to Debconf17 (camera could not get high enough and the group is on flat ground - not great). Even the Debconf25 photo was suboptimal from this perspective. The Debconf23 photo was a very good example from the recent years - good height and also the group was positioned in a semi-circle so there were no people directly in front and very near to the camera.
So you are looking for the highest point you could get to (even if that requires a special permission of key or a ladder) with a field large enough to fit the whole group comfortably. How to check that? Normally I simply take a photo from the top of the whole area and note down from there where the extreme corners of the group could be and still be fully seen in the shot - not blocked by trees, buildings and shadows. Then I go down and measure that space. Rule of thumb being - people in one horizontal line can stand 1 normal length step from each other and two horizontal lines can be half a step from each other vertically. So I can just measure a rough rectangle in steps, multiply the sides, multiply that by two and I have the rough number of people that can fit there for the photo.
Once you have a candidate location or two, it is important to check them at the same time-of-day as you plan to do the photo (see organization section for that). You want to make sure that the whole area of the group is in the same illumination - if half of the group is in the sun and half in a shadow, then you will be having a very bad time later. The absolute ideal positioning for the group photo is to have everyone be in shadow, but still have enough bright skies and bright buildings in front of the people to give good illumination of the faces. Worst you can do is have the sun be behind the people (so all the faces are really dark) and second worst is have the sun be directly in front of the group, so that the faces are very well illuminated, but everyone's eyes are closed because they are being blinded by the sun. And sometimes all you can do is pray for some light clouds to provide for even and dispersed light. Debconf23 was very lucky that way.
Another consideration is to how people are going to get to that place. You need to consider accessibility needs of people (it is ok, if it takes more effort or time, but it needs to be organized and communicated well in advance). And you need to consider how the big masses of people will be getting there - how to tell people where exactly it is and how to get there from various locations where people might be hanging out during the event?
Having an alternate location indoors might be necessary if the weather report for the next days is not sufficiently predictable. We had to use that contingency in Debconf9, for example.
Organization
It's hard to take a good group photo if half of the group does not show up or is too late, so this needs some organization to happen smoothly.
First of all you need to choose date and time for the photo. The photo does not take too much time from the schedule of the event and can be squeezed in after all the other events are already scheduled. In fact I prefer that as it allows you the flexibility of choosing the date based on weather conditions and time based on light and shadow conditions in potential photo spots. You don't want to choose the daytrip day as most people will be away and return times are not really predictable. You do not want to choose the morning after Cheese and Wine party for obvious reasons. First day and last two days are also sub-optimal as some people arrive late and some leave early for various personal reasons. Also you don't want it to happen just before Cheese and Wine either because then you'd have very little time and clarity to do the processing of the image on the same day.
For timing, the best way, in my experience, is to schedule the photo directly after the end of talk sessions before a meal break - lunch or dinner. Typically in the Debconf schedule there are 2-3 daily breaks planned, say for Debconf25 there was lunch, afternoon break and dinner. Talks are planned to end ~10 minutes before those breaks (and meals) begin, so for example, afternoon break starts at 16:00 and all talks in the previous block end at 15:50. In such a case just schedule the "Group photo" event from 15:50 to 16:05. This gives people the info to go there directly from the end of all talks and that they will have sufficient time for break/meal afterwards. Do not forget to specify the location (as exactly as possible) in that event entry and make sure to post it at least two days in advance. People often want to wear something specific for the photo and thus need to know about it in advance. This also makes sure that people do not make alternate food plans for that specific break and don't leave the venue.
Announce the date, time and the exact location as wide as possible, don't be shy. Announce and discuss mailing lists, IRC, Signal, Telegram, make sure the front desk knows in case anyone asks in-person, ... Check that it is again included in the announcements email on the day preceding the photo date.
When the date has arrived, it is a good idea to check in early with people with special mobility needs to make sure they know where to go, how to get there and how much time they will need to be able to get there on time.
As the final round of talks before the group photo is starting up, it is time to recruit "runners". I've had great success with this technique. The idea is pretty simple - for each room where people congregate (talk rooms, hacklabs, cafeteria, outside hackspace, front-desk, ...) go there and choose one person. You want to choose a person that you will recognise and remember among everyone else in the group, either because of who they are or what they are wearing, whatever works best for you. If they agree to help, instruct them to: "at end of talk, announce that the group photo happening now and the location, herd people towards the photo location, be the last person out, make sure there are no stragglers from this area behind you, when you arrive to the photo place I will assume that everyone else from this room is also now there, when you are there catch my attention and show this sign so I know for sure that it is all good and make sure that I did see it from you". With that sorted out all you will need to remember is how many runners you recruited and how many have reported in to figure out if everyone has now arrived or if we still have to wait for someone or some group.
Then you will only have one last point of organization left - shaping the crowd into a group. People will not know what your vision for the group photo is, so you will have to give clear and LOUD instructions on where people should not be standing. Use clear, large gestures to support your words. You want to compact the group, have the people that just joined in the last moment and are standing to the side come deeper in and join the crowd. Have any holes in the middle of the crowd filled in. Forming a semi-circle instead of a blob helps with averaging face-to-lens distances. Make sure people are not in unexpected shadows. Make sure carried objects, like umbrellas of flags do not cover the faces of other people. Take the time to look at everyone face to make sure there are no people hiding behind someone's shoulder - typically they are not aware that their face is in fact not really visible. If there are such people, call them out and point directly at them and encourage them to step forward, if they wish to do so. You are the only one seeing the final picture now and only you can correct it before capturing the moment. So a few extra seconds here are worth taking, even if 300+ people are standing in scorching heat and waiting on you.
When you are happy with what you are seeing, make sure to tell people clearly that you are now about to take the pictures and again remind them not to move and explicitly not to turn their heads to the side until you are done (this is the source of most of the extra work in processing). Be very loud and clear and make sure you have everyone's undivided attention before you start saying the important stuff.
When done - say so. There will be other groups that will want to also have a photo taken after the main group is a bit more dispersed, so don't run away. Typically at least the T-shirt group will want a picture and also all the organizers.
Final bit of organization during the group photo shooting itself is the sneaky self-insert. You may choose not to bother with it, or do it in the simplest way, like I did in Debconf6, but if you really want to blend in with the crowd, you need to have someone else take a photo of you in the exact same location at the same date and time from the same location. So you should already during shaping the crowd decide where you would fit in, it is easiest to blend in at the back of the crowd and to one or other side, so that it appears like you are just standing behind the shoulders of a couple peoples. Remember that spot - it is easiest if you stand in the exact same ground spot when your photo is taken. Just go down, recruit a volunteer to take your photo, make sure the settings are fixed to the same ones as for the group photo shots and have them take a handful of shots of you - one of you centered in the camera frame and a couple more with you more towards the corners of the frame. This distortion from being off-center in the frame may be important later.
Preparation
In addition to preparing the crowd for the photo, you also need to prepare yourself and the equipment. Make sure you have dusted your camera sensor and cleaned both inside and outside glass of your lens. It is usually a good idea to remove any filters from the lens. Install the hood, if that could help with blocking the sun flares. Make sure you have the right lens and that you have installed the right lens.
For fixed settings I typically shoot in JPEG with RAW being there more like an emergency backup. The extra dynamic range of RAW could be used, but it is really complex to do that in combination with image blending and it is hard to get right, so I prefer an all-JPEG workflow and fix the dynamic range in the scene itself, before shooting. For Canon I am using the Standard profile that boosts the color saturation and sharpness a bit as I just enjoy that look and find it hard to get anything significantly better from RAW data even with a lot of effort. In any case make sure you have enough space on the cards to take at least 100 images and that you have a full battery. Do not use high speed burst setting because it is then too easy to take too many pictures at the start of the sequence and be stuck with your camera still in "Busy" state writing big RAW files to slowish SD cards and not allowing you to finish the full picture rapidly.
You want to have the shutter speed at at least 1/100th of a second to prevent blur from both your hand movements and also from people in the shot moving around a bit (image stabilisation will not help you there). And you want to have the aperture to be around f/8 - lower apertures risk people in front or behind falling out of focus, make the lenses look less sharp. Higher apertures also start to become less sharp due to diffraction effects above f/8. ISO should stay as low as possible, ideally at ISO 100, but if there is not enough light then upping the ISO to 400 would be the first step that I would try to do and second would be decreasing the aperture to f/5.6. If there is too much light, then increasing the shutter speed should be the safe thing to do.
As people start to arrive into the shooting location - check the exposure and nail down the settings, ideally in manual mode. Consider that left side could be a bit lighter or darker than right side. Err on the side of making the picture a bit too dark as there is more depth to darkness before cut-off compared to clipping on the high end. However, do not trust the exposure detection, instead take a picture and look specifically at skin tones in faces of people that already are standing in the photo area. Faces are the key bit and the exposure needs to be adjusted just to the faces and ignore darker of lighter clothing. Do some test shots and find settings where faces look not too bright, but also not very dark and fix those settings in manual mode.
Now you are ready for the action. Shape the crowd, check the faces and the action can start!
Execution
During taking of the group photo you want to finish it fast, but at the same time you have to take the time to make it right. If you hurry too much under pressure, you risk being left with unusably blurry images and the whole effort wasted. Having already prepared and verified the manual settings makes it easier.
When you are taking pictures, you have to remain as still as possible - even at very high shutter speeds even slow hand movements are still bad for image quality. So think of the movement as of biathlon athlete shooting the very middle of five, very separate targets - take a burst, reframe, then steady up for a second and only then take the next burst. 3 frames per burst are sufficient. 90% of the time the very first photo of a burst will be best. As you move from frame to frame, aim for just a bit more than half-frame overlap. This will give the opportunity to skip frames if all is good, but also have backup coverage of every face in case of problems. Proceed systematically, I typically start off on the top left of the crowd, then go right until the end of the line, then shift down half a frame and go left until the end and repeat until I am done with the crowd.
After that it is very helpful to also immediately take photos of a "frame" around the whole crowd. Stitching process often distorts the frames in weird ways that leave holes in the resulting image that you can fill if you have a wide frame around the crowd. It is possible to compensate with creative cutouts in the final image (like Debconf9), but the more framing room you make, the more flexible you will be able to be with cropping of the final photo. The frame also gives you the opportunity to capture more of the context of the place and space.
As an example, Debconf25 group photo in the end consisted from 9 images + 1 for sick people + 1 for me. I ended up missing the framing shots for bottom left, top left and top right corners. To get there I took 68 images. And in some years it was more than a hundred.
Processing
This part might be less stressful than taking the pictures from intensity perspective, but it lasts longer. Depending on you luck, skill and perfectionism it can take anywhere from 3 to 9 hours of work to complete.
Before you start, however, you should first request things that you will need for other people. This can even be done before taking the actual group photo, but usually I forget. To finish the photo you will need three things:
- good quality vector graphics of the current Debconf logo
- good quality vector graphics of the next years Debconf logo (even if preliminary)
- motto of the conference
The first two you should be able to get from the respective organizers. The motto is harder. I typically try to ask the current DPL to come up with something describing the current mood of the project or of the event, but it is rare that it is that easy. Most of the time I came up with something as I was editing the photo and reflecting on what was the mood, the feeling, the mojo of this conference and of this year was like. Bend that around a recognisable phrase or expression, make it a bit more insider-relevant and you are on the right path. Some years this was the hardest part.
For the panorama stitching I will describe the workflow that has served me good for years, but maybe there are better ways possible nowadays. Feel free to let me know!
First I would save all photos taken and select one sharpest photo from every burst. Next I would select the minimal number of photos that appear to be covering the entire crowd. The fewer images you use, the better in the end because the most quality problems crop up in the areas where photos are getting stitched together. Fewer seams leads to fewer issues.
Open Hugin (you will also need enblend and enfuse installed) and import your minimal set of images into it. Click the "Align" button and wait a while - the processor will be trying to figure out keypoints in each image and then try to match these points between the images to try to fit them all together into a single projection. To do that it will distort the images. This is the trial and error process part. You may need to add, remove or replace images to get the stitching to work or to work better. You may want to add more of the frame images to fill the ragged holes around the image.
After initial alignment, go to "Move/Drag" tab and move the image a bit up in the projected field of view and make it a bit more central visually. That will help a bit with the distortions in the near-by people and people in the corners of the image. In the "Crop" tab set the initial crop - leave it generous, you can always crop more in later steps. Do not be afraid of leaving in sizable chunks of black homes, empty skies or grass. All of that can be filled in later as well.
Go back to the "Assistant" tab and click "Create panorama". It is good enough to have JPEG output at 100% quality using exposure corrected low dynamic range output option. Make sure to check the "Keep intermediate images" option. This will not only generate the final, merged panorama, but also keep around the individual images after perspective correction and exposure blending steps. These are critical for fixing blending error in the next step.
You might need to go back a forth a few times with a different sets of source images, maybe adding some image between other two, maybe removing another to reach a better starting point. The key part to pay attention - how many ugly stitches are there in the image. Check every face, the blending algorithms do not recognise faces and sometimes try to stitch one face from two or more images creating very weird effects. They can be fixed in the next step, but it is rather hard manual work, so the fewer such faces are in the blended image, the less work you will have. In some years I've managed to find a combination where all faces were good and in other years I had to manually fix 13-15 faces.
Do not try to blend the extra pictures (like with you or with sick people) into the main panorama with Hugin - it will get very confused with the parts of the grass that it is able to see where other people were standing.
The next is the final processing in GIMP. Think of it like a large and complex project - do as much as possible in separate layers, save often.
Fixing wrongly stitched faces and also putting yourself into the photo are very similar activities in the end. Just the scale and the source differ. For yourself you just cut out yourself (upper torso is enough) from the separate photo. For corrupted face, choose one of two intermediate images that the Hugin created where the face is transformed, but not yet merged (with a different version of itself). In either case crop the photo to roughly the interesting size and put roughly in the right spot as a separate layer on top of the group photo background. Reduce the opacity of the small layer to 30-40% and zoom in to 400%. With that it is much simpler to position the layer with pixel precision. Then all you need to do is add a layer mask to this layer and paint it just right. Basically in layer mask black means transparent and white means non-transparent. So you need to just make everything that is you have white mask and everything that is not you have black mask. And smudge the border a bit with finger tool or blur to make the transition smoother. Easy to say. Hard to do. This is what takes most of the actual work hours in post-processing.
You might miss someone. I am sure Phill is just thrilled to see me in the very middle of the Debconf25 final picture .... But do try to fix them all.
Use large, sweeping geometric figures to cover up black holes, empty grass fields and other sub-optimal corner features. And then use that newly created free space to put in a large version of the logo of this years conference, decently sized motto and slightly smaller invitation to the next years conference.
Do not forget to add a copyright and license statement somewhere in the corner in smaller, but still well readable font. I am using a text like: "Photo by: Full Name, Email: fullemail@debian.org, License: GPLv2+ or CCv3-BY" This ensures that this image may be used in any press coverage (with basic attribution) and also can be included in any GPL-licensed software, if that ever comes up. The same statement is also in the metadata of the image file (see Image-Metadata-Edit metadata in GIMP) along with information that states that this is "Debian Developer Conference Group photo, City, Country, Year". Image->Image properties->Comment is another place where GIMP hides this EXIF information.
For ease of use, in addition to a full-resolution image it is also useful to make a lower resolution version that would still fit on a 4K screen at full resolution, so about 3840px wide. Some photo hosting services set other limits for image size as well, so it might be needed to scale the image down below 100Mpix to upload it to Google Photos, for example.
Publishing
So, it is finally 1AM and the group photo is ready! How do you push it out to people? Well, in all possible ways and places. Again - don't be shy, people do really want to see it.
Push it to whatever you use for your shared photos. Push it to Debconf shared git (note that this is GIT-LFS repo, make sure you know how to add content to the LFS specifically). All permanent links to that in GroupPhotosAll wiki. And then send those links to IRC, Signal, Telegram groups, debconf-announce mailing list. Publish it in your blog and push that to Debian Planet. Push it in Threads, Bluesky and Mastodon. Send an email separately to Debconf orga team. And one to Debian Publicity Team so they can put it into the Debian Home Page and push via Debian micronews accounts.
And that is about it. Now you can go back to enjoying the rest of the conference. Or running around doing other things that you think need to be done. It's up to you. You did it. This moment will remain with people for a very long time. And you helped.
Questions? Feedback? Just ask here or here.
06 Jul 2026 7:30pm GMT
Review: The Player of Games, by Iain M. Banks
| Series: |
Culture #2 |
| Publisher: |
HarperPrism |
| Copyright: |
1989 |
| Printing: |
February 1987 |
| ISBN: |
0-06-105356-2 |
| Format: |
Trade paperback |
| Pages: |
295 |
The Player of Games is political space opera and the second book in the shared Culture setting. As with most Culture books, the reading order is not particularly important. It won the 1989 Locus Award for best science fiction novel and sometimes competes with Use of Weapons as the consensus best Culture novel.
This review is a re-read and yet another experiment in how to re-review a book. This time, I decided to write a full second review with substantial spoilers so that I can talk in more detail about the book. If you want to avoid spoilers, or just want to see how my thoughts have evolved from my first reading, see my original review from 2005.
Gurgeh plays games. He is probably the best strategy game player in the entirety of the galaxy-spanning Culture. He has written papers on game theory, won innumerable major championships, and is a celebrity in the circle of like-minded aficionados.
Gurgeh is also bored and in the middle of the Culture equivalent of a mid-life crisis. As the story opens, he's vaguely unsatisfied and adrift, unenthused by his normal activities, and searching vaguely for something that will break through his ennui. He is caught by surprise by the thrill he gets from a moment's misunderstanding in which an opponent suspects him of cheating, which sets him up to be (apparently) clumsily blackmailed by a deeply unpleasant drone named Mawhrin-Skel.
SPOILERS BELOW. If you have not read this book, consider stopping here and instead reading my original no spoiler review.
The first hundred pages of The Player of Games is a slow, somewhat plodding introduction to Gurgeh, his social circle, and life in (one part of) the Culture. I remember being fascinated by this part the first time I read this book. It was only the second Culture novel I read and the first set in the Culture proper, so the world-building underlying this odd post-scarcity utopia on a vast intelligent habitat with sentient drones, complex privacy rules, endless cocktail parties, and apparently directionless socialites was intriguingly unlike the other science fiction I was reading at the time. This time through, I have to admit I was less impressed.
Gurgeh is not very likable, and his desultory mid-life crisis is a little boring. None of his friends have enough depth to appear as more than side notes, in part because Gurgeh doesn't seem to care enough about any of them to make them interesting to the reader. I've since read seven other Culture novels, so Banks's cocktail parties hold less charm and I was impatient for the real action to begin.
These chapters are still important, though, because they establish how utterly average Gurgeh is. He has one unique talent, a deep affinity with and obsession with strategy games, and is otherwise a bit of a depressed narcissist with a few casual relationships, a friend that he barely confides in, and a comfortable and familiar life. He is not in any way a hero or a charismatic figure; he just happens to be exceptionally good at one thing, enough to make him famous among people who care about that one thing and probably unknown to anyone else apart from the occasional idly perused news headline. He is the Culture's equivalent of the world chess champion.
The Contact division of the Culture has a problem. The Empire of Azad in the Lesser Magellanic Cloud is a nasty, expansionist culture of the sort that Contact would like to deal with before it causes broader problems. The Culture's normal approaches are thwarted by an unusual organizing principle: The empire is built around and takes its name from the game of Azad, a highly complex strategy game developed over thousands of years. Azad is the civil service exams, means of political and religious dispute resolution, selection mechanism for the emperor, and civic religion. Faced with that oddity, Contact turned to Special Circumstances, the Culture's more aggressive and less restrained way of dealing with tricky problems. Special Circumstances, in turn, needs someone who can learn how to play the game of Azad. They want Gurgeh to take a very long trip.
For all of Gurgeh's dissatisfaction, he's not impulsive enough to take a five year journey away from his life and everyone he knows just to play a novel game. Conveniently, Mawhrin-Skel's blackmail resolves this reluctance.
The game of Azad requires some suspension of disbelief. Banks provides a few glimpses at the mechanics of the game, but those details are insufficient to reconstruct the rules, and some of the claims made about its properties are improbable at best. The best mental model I could build for it is a strategy or simulation game built around units and territory control, with supplemental side games used to build up resources for the main boards, but it's more of a plot device and a set piece than a world-building invention. The significance of Azad the game is its role in society: The Empire of Azad believes they have constructed a game whose complexity so closely models reality that the skills required for success in the game are precisely the skills required for success in the empire.
The Empire of Azad is wrong, and this is one of the core themes of The Player of Games. As with many Culture novels, what Special Circumstances tells Gurgeh is, at best, incomplete. Gurgeh is a refutation of the basis of belief in Azad; this is why it is important thematically that he is an average, somewhat unlikable citizen of the Culture whose only special characteristic is skill at learning and playing games.
Azad is the myth of meritocracy given physical form as a game. It provides the anchor of the empire for the same reason that societies on Earth place enormous weight on standardized tests, capitalist success, or public debates. All societies face the problem of selecting good leaders and testing opposing beliefs, and all societies attempt to find some form of shortcut, some set of general principles, tests, or objective metrics used to select the best person via a process that people consider plausible and fair. The game of Azad is a paragon of apparently meritocratic process. No matter who you are or what your background is, if you excel at the game that, in theory, objectively tests your skills, you are given a position of power.
In practice, the Empire of Azad is not that naive. Manipulation outside of the game happens, only some players have the opportunity and resources to spend years learning the game at a deep level, and only their dominant sex truly stands a chance in games that matter. But neither is Azad's place in society a fiction. There is corruption around the edges, and a lot of people are filtered out before the games begin, but the highest echelons of society are true believers. The game does decide both rank and policy; Banks is arguing against a strong form of apparently working meritocracy.
Gurgeh represents a refutation of this meritocracy through the mechanism that breaks every supposed meritocracy: The map is not and cannot be the territory. Any objective evaluation criteria is necessarily separate from what it is trying to measure, and in that separation there is always an opportunity. Gurgeh has none of the background, training, or mindset expected for a player of Azad because he could not possibly care less about any of the things Azad represents to the Empire. What he has instead is a preternatural skill at games and vast experience with the most intricate strategy games the Culture, a much larger society, has been able to devise. He also has both the patience and the resources to devote himself entirely to learning a game for several years, and past experience in doing that with other games.
If Azad represents the civil service exams, Gurgeh is the person who has no interest in ruling but adores memorizing facts and taking tests. The theory behind the exams is that the skills to pass the exam only come with the correct mindset to do the job for which the exam is testing. Gurgeh is an existence proof that this is not always the case.
Banks also uses Azad to show another aspect of the failure of meritocracy: A society whose rulers are chosen through a competition takes on the shape of that competition. The Empire of Azad is run by the winners of competitive games, so the empire is a winner-take-all system of dominance and status hierarchy. Here, I think Banks lays the point on a little thick; the empire is an irredeemable hellhole of misogyny, sexual abuse, slavery, genocide, and military colonialism to a degree that is a bit hard to justify solely from the game. There is a beautiful turning point about two-thirds of the way through the book where Gurgeh's face is shoved into just how vile Azad society is and reconsiders his approach to the tournament as a result, and I think it may have been a bit stronger if the morality had been a little less blatant and absolute.
To the extent that Gurgeh has political beliefs, he represents a Culture flavor of soft liberalism. He has opinions about acceptable and unacceptable ways to treat people, but he grew up in a utopia and his opinions are mostly theoretical. When he sees just how vile people can be outside of that utopia, he is revolted and appalled and redoubles his efforts to fight that society in the only way he knows how, inside of a game. This part of the book follows the standard, if enjoyable, plot of a flawed but fundamentally decent person discovering a true injustice and becoming enraged at it.
In a lot of books, that would have been where the plot stops. Banks is doing something more subtle and more interesting, though. Gurgeh wipes the board with his next challenger, but that soft liberalism eventually proves inadequate. To learn the game of Azad and to play in the tournament, Gurgeh has been wrapping himself in Azad culture and its language, and in that frame of mind he is losing the climactic game of the book. It's only when he is pushed to think in Marain, the native language of the Culture, that he understands what is happening in the game and how to defeat Nicosar, the emperor.
This, on the surface, is a bit too close to the strong hypothesis of linguistic relativity to be entirely plausible, but such an objection would miss the point that Banks is making here. Marain is a construct, the product of considerable effort within the Culture to match language to the most nuance and complexity that brains can understand, and it is a language, one of the most social and collective artifacts a society can produce. Gurgeh is a remarkable individual with an impressive talent, but individual skill and achievement can only take him so far. The critical final piece is the support of societal infrastructure intentionally built and maintained to help him make better decisions.
Once I noticed that point, I saw it everywhere in the book. The empire repeatedly attempts to subvert or distract Gurgeh with drugs, pleasure, politics, or danger, and at each point there is some critical piece of Culture social infrastructure that blunts the attack. Illicit substances and forbidden vices are less tempting to someone for whom the illicit has been demystified by the Culture's gentler approach to rules and boundaries. Embedded biological mechanisms allow him to divert drugs so that they don't affect him. At first, it's easy to read this as an exercise of self-control, but on this re-read I saw how much behind-the-scenes infrastructure supports Gurgeh's ability to ignore temptation.
This social support notably does not take the form of some ideological principle or moral framework. Gurgeh is not a monk or an ascetic, as is obvious from the first third of the book, and he has no political ideology to speak of. He is a flawed person with a streak of danger-seeking and self-aggrandizement, which the Culture exploited to get him involved in Azad. But through a lot of hard work, technological and social, the Culture has given him a robust foundation and a set of mental and biological tools that make him remarkably hard to corrupt. The implication is that if Gurgeh has that support, so does every other member of the Culture. It's neither a religion or an ideology; it's well-maintained infrastructure, complex and nuanced and pragmatic, and composed of innumerable small solutions to specific problems.
I think the true climax of this book takes place the night before the final day of the game, in the tower meeting between Gurgeh and Nicosar. Gurgeh has realized that he's already won; there's nothing Nicosar can do to salvage the game. He's also seen that the game represents a cultural conflict and conversation between the Culture and Azad and he's overwhelmed by the beauty of that communication and sadness that the game is about to be over. Gurgeh's true passion is the game. It is doubtless easier for him to be magnanimous because he's winning, but he also loves the structure of the game itself and what two players can create in a sort of collaborative competition.
Gurgeh tries to express all of this to Nicosar. It is one of the most centrist liberal moments I've ever read in a novel, the pure essence of "reaching across the aisle" or "disagreeing agreeably." Gurgeh has seen something beautiful, something he's created with Nicosar, a moment of true communication, and he wants to share it. Surely Nicosar sees the same thing; surely now that he sees Gurgeh has won, he can appreciate the board structure, savor the moment, understand the transient beauty of a game that is about to end and how perfectly it captures the meeting of their different cultures. That moment does Gurgeh real credit. It's a rare sign of emotional and spiritual depth in a character who often seems superficial.
Nicosar meets this outreach with unhinged, furious contempt. He despises everything Gurgeh represents, everything the Culture is, and the next day he tries to kill Gurgeh on the board of the game.
It is a devastating critique of liberal tolerance, all the more so because Gurgeh's attitude and outreach is truly admirable. It is perhaps the most sympathetic moment that Gurgeh has in the entire book, the moment where the reader thinks "oh, I get it, I understand what he really cares about." Gurgeh assumes that Nicosar is not his position or culture, that they have made a moment of connection that transcends all the awful things he previously learned about the empire of Azad. That Nicosar, despite being the emperor of the society that is currently doing so many things Gurgeh finds repulsive, cannot be as bad as his society. And Nicosar considers that outreach to be weak, disgusting, and vile, and does everything that he can to destroy it.
One of the oddest twists of our current moment is the obsession that some billionaires have with stories that are moral arguments against exactly what those billionaires are currently doing. The most obvious example is Peter Thiel, who is obsessed with The Lord of the Rings and has devoted his life to becoming Saruman, a character who is notably not one of the protagonists. It's as if something in them recognizes the power of the story, but some deep shame or narcissism or simple aversion allows them to completely ignore what the story means.
Elon Musk is obsessed with the Culture novels. He names the SpaceX rockets following Culture Ship naming conventions and has claimed that one of his goals is to bring about a Culture-style utopia. And in 1989, years before anyone had ever heard of him, Banks cast him as the villain of The Player of Games. There is so much of Nicosar in Musk: the superficial charm, the limited brilliance (Nicosar is a very good Azad player), the ambition, the pride, and the vicious, spitting contempt for everything the Culture represents at every level deeper than superficial materialism. And Banks is as clear about his opinion of Nicosar as he is about anything in any Culture novel.
One of the oldest fictional answers to what a society does with people like Nicosar is the consequences of hubris. By being unable to accept defeat, by holding a vision of the world so tightly, they become brittle and unstable and bring about their own collapse. In a broad sense, that is what happens in The Player of Games with a bit of pushing from Special Circumstances. By the politics of the game, Nicosar had already won; the results of Gurgeh's earlier games had already been faked, the final game had no political consequences, and everyone who knew its true outcome could be disposed of. Gurgeh's win could have been covered up and ignored. But Nicosar could not endure the thought that he would be beaten by someone like Gurgeh, playing Azad the way that Gurgeh was playing it. Gurgeh had to be destroyed on the board of the game; Nicosar's pride did not allow any other outcome, even if it meant Nicosar's death.
However, Special Circumstances didn't let hubris be the end of the story. In the climax of the book, the drone protecting Gurgeh also makes sure that Nicosar dies. There is a fig leaf of plausible deniability, but it's so obvious that even the unobservant Gurgeh sees through it immediately. It's hard to escape the feeling that was Banks's answer to what to do with people like Nicosar: They cannot live within society, because they will not live peacefully within society.
I enjoyed The Player of Games as much this time through as I did the first time, but for entirely different reasons. In my first read, I focused on the world-building of the Culture, the political machinations, and the concept of games as conversations between the players. This time, I was struck by the political commentary just below the surface. Special Circumstances wanted to resolve the problem of the Empire of Azad without a military conflict and occupation that would be long, brutal, expensive, and demoralizing. They found an answer that relied on the diversity of the Culture. A vast, utopian civilization in which people can pursue whatever interests make them happy produces innumerable microspecialized oddities, people with astonishing talents in some small field that only a tiny fraction of people care about. It produces, in other words, innumerable keys for locks that you may never encounter, but which are invaluable if you happen to stumble across that lock.
Gurgeh is not a hero. He is not a paragon of moral virtue, or even a charming charismatic, He is an entirely average member of an extraordinary society, the beneficiary of thousands of years of concerted effort at producing a robust, flexible foundation on which to raise robust, flexible citizens with a shared sense of basic morality. Those people, by themselves, do not solve all of life's problems; the structure of Special Circumstances and its willingness to bend rules in order to maintain them is the tension and deus ex machina in all of the Culture novels. But much of the strength of Special Circumstances is that it has an entire civilization of people like Gurgeh to draw upon when it needs them.
It has those people because the Culture comprehensively rejects competitive meritocracy, something that some readers of the Culture novels appear incapable of comprehending.
Rating: 9 out of 10
06 Jul 2026 3:09am GMT
This is a bug fix and minor feature release over INN 2.7.3, and the upgrade should be painless. You can download the new release from ISC or my personal INN pages. The latter also has links to the full changelog and the other INN documentation.
For the full list of changes, see the INN 2.7.4 NEWS file.
As always, thanks to Julien ÉLIE for preparing this release and doing most of the maintenance work on INN!
06 Jul 2026 1:57am GMT
05 Jul 2026

Team Rcpp is excited to share that an brandnew new version 1.1.2 of Rcpp is now on CRAN, has also been uploaded to Debian, and has already built for r2u and r-universe; Windows etc builds at CRAN should follow in due course.
Rcpp has long established itself as the most popular way of enhancing R with C or C++ code. Right now, 3236 packages on CRAN depend on Rcpp for making analytical code go faster and further. On CRAN, 13.4% of all packages depend (directly) on Rcpp, and 61.4% of all compiled packages do. From the cloud mirror of CRAN (which is but a subset of all CRAN downloads), Rcpp has been downloaded 121.6 million times. The two published papers (also included in the package as preprint vignettes) have, respectively, 2263 (JSS, 2011) and 471 (TAS, 2018) citations, while the the book (Springer useR!, 2013) has another 742.
The is the second update in the 1.1.* series which had, among other changes, switched to C++11 as the minimum standard. This release continues as usual with the six-months January-July cycle started with release 1.0.5 in July 2020. Interim snapshots are always available via the r-universe page and repo. We continue to strongly encourage the use of these development released and their testing-we tend to run our systems with them too.
Having said that, we would like to reiterate that we strongly object to the upstream R release and change management which in this 4.6.* cycle made several abrupt changes forcing packages which consume header files to make very abrupt change. Rcpp, just like numerous other CRAN packages demonstrates that API changes can be undertaken responsibly in a managed manner which allows for transition periods followed by possible warning periods, deprecations periods and finally (but only at long last) errors. What happened here is a speed run to the final stage of forced errors. Uncool and irritating for something as widely used as R. This forced us to make an interim release 1.1.1-1.1 even though we have of course had a policy of always keeping properly tested, installable, and error-free releases candidate version in the main repository branch and hence available via R-universe tested packages for all relevant platforms, and even via binaries for most (including Ubuntu LTS). It would be nice if R Core found a way to take advantage of this. Maybe development cycles, running apart for a year as they do for R, should also include selected packages.
Once again I am not attempting to summarize the different changes. The full list follows below and details all these changes, their respective PRs and, if applicable, issue tickets. Big thanks from all of us to all contributors!
Changes in Rcpp release version 1.1.2 (2026-07-01)
Thanks to my CRANberries, you can also look at a diff to the previous interim release along with pre-releases 1.1.1-1 and 1.1.1-1.1 that were needed because R-devel once again sudden decided to move fast and break things. Not our doing. And there also should not have been a need to two such uploads but it was amateur hour all around.
Questions, comments etc should go to the GitHub discussion or issue section, or the Rcpp list. Bugs reports are welcome at the GitHub issue tracker as well. GitHub offers decent search for issue, pull requests and discussions; as many topics have been covered it is worth checking as well.
This post by Dirk Eddelbuettel originated on his Thinking inside the box blog. If you like this or other open-source work I do, you can sponsor me at GitHub.
05 Jul 2026 3:18pm GMT
Debian Related Work
- Uploaded wofi 1.5.3-1 to unstable
- Uploaded wob 0.16-1 to unstable
- Uploaded labwc 0.20.0-1 and 0.20.1-1 to unstable; these releases come with support for wlroots-0.20, which made labwc reenter testing
- Uploaded swaylock 1.8.5-2 to unstable to make it use the
common-auth directive of pam (seeh #1140096)
- Uploaded swayimg 5.4-1 to unstable
- Uploaded wayback 0.3-2 to unstable, which was waiting in experimental for a reupload and I had forgotten about it; also fixed a typo in wayback upstream
- Uploaded xdg-desktop-portal-wlr 0.8.3-1 to unstable
DH Related Work
The search app I was working on last month was still a focus in June. I refactored the data model a bit and made it simpler. I stumbled over the Python Koans and Koan 15: The Invisible Ink gave me the idea of using unicode normalization when indexing the items.
I released a couple of bug fix releases for the APIS framework, namely 0.64.2, 0.64.3 and 0.64.4. I also release 0.65.0 which is one step further in dropping support for the legacy apis_entities app. When the search module is merged it will give way for removing the last bits of the old cruft to be removed.
During a regular dependency update session I looked at the changes in the dal dependency. After a long time with no commits, the project suddenly had a lot of commits co-authored by Claude and then released a new major version with a regression. Given the state of the project, we decided to keep using the previous release for now and look into replacing the dependency with an HTMX based solution. I implemented a POC for one of the plugins we develop and it was actually pretty easy. I also managed to combine the autocomplete approach with a multi-select form field, based on this blog post.
In the PFP project I finally merged the stats endpoint which give statistics about the named graphs that are used as data sources.
Other
I attended BSidesVienna 0x7EA but it was on one of the hottest days this year so far so I left after a couple of talks.
05 Jul 2026 5:28am GMT
04 Jul 2026

As previously mentioned, I am leaving Chrome; my last work day was yesterday. (Sorry to those with July 3rd off that I didn't get to say goodbye to!) But I'm staying in Google, on more internal projects :-)
After 1100+ commits it's hard to pick out one thing that I love the most; as a team, we launched a lot of (IMO) useful CSS features and fixed a lot of issues. But somehow, I keep on gravitating towards performance, and perhaps this commit is the one I will remember the most fondly; a couple hundred lines to speed up repeated attribute selectors a lot. (If you ever wonder who would be doing that; well, there's a fairly high chance that you have an extension injecting a stylesheet with a lot of a[href*="..."] rules…)
Upwards and onwards. Please write lean, clean CSS; I won't be there to save you from now on. :-)
04 Jul 2026 2:21pm GMT
I am somewhat jet-lagged, having returned from Washington DC just before the 250th anniversary celebrations which will be happening today. I was part of a delegation sent by my employer to the AWS Summit there this week, partly to kindle interactions between PA Consulting and Jacobs who have recently taken a 100% share in PA.
Much of our conference time was spent in meetings with AWS executives impressing the facts of the Jacobs/PA partnership upon them, and discussing plans to broaden our collaboration in different sectors. So I spent even less time than usual at conference keynotes, talks etc.
This was my first time to DC, and I did find some time to see some sights - unfortunately the White House is rather fenced off at the moment following the UFC match, but I did make it to the Capitol and the Washington Monument in the heat.
Last Sunday a select few of us attended the baseball in Baltimore - rather than the game, the thing that stood out for me was the military jets flying in formation over the stadium every few minutes, and the block-booked seats for the Navy in uniform, who were having a great time! This is obviously a hearts-and-minds thing, but it provides a stark contrast with the UK - I can't think of a time I've seen uniformed military at the football (soccer) or cricket for example. Or Union Jacks flying at shopping centres.
Speaking of soccer, England just about beat DR Congo while I was out there, but it was a close-run thing as we were 1-0 down at half time. I can't claim to be following the World Cup too closely, but I overheard comments (from US passers-by) that made clear it would have had a significant reputational impact on our standing in the world had we lost.
Another highlight for me was the Church of the Ascension and St. Agnes, where I was able to get my fix of Anglican plainchant and four-part harmony for the week. At morning prayer, I noted they use "God save this land" rather than "God save the King" during the responses - I've since found other sources online that choose "God save the State". It's strange to think that the words of the BCP dating back to 1549/1662 are a point of continuity since well before the 1776 declaration of independence, and yet are still adapted and used in worship today.
04 Jul 2026 12:40pm GMT