11 Jul 2026
 WordPress Planet
Gutenberg Times: Roadmap 7.1, Gutenberg 23.5, Responsive Styling, Migration to Block themes — Weekend Edition #368
Hi there,
After a four-week break - courtesy of a sciatic nerve with strong opinions - I'm happy to be back in by office chair and in your inbox. There is plenty to catch up on.
Beyond the updates on the new WordPress and Gutenberg versions, you'll find stories below from WordPress veterans on migrating to and working with block themes on client sites and dive into more complex theme solutions or
Don't let me keep you from your light summer reading.
Have a splendid weekend ahead!
Yours, 
Birgit
Developing Gutenberg and WordPress
The team around release lead Aaron Jorbin pushed WordPress 7.0.1 Maintenance release out the door to update millions of WordPress sites. The update covers 17 Trac tickets and 14 Gutenberg PRs. The full list is available in the RC 1 announcement post from last week.
In WordPress 7.0.1 Fixes Registration Spam, wp_kses() CSS Corruption, and 7.0 Admin Design Glitches, I cover the most important fixes for end users and developers of this release. You'll learn how the registration-spam loophole got closed, which admin design glitches were sanded off, and why developers can finally remove their wp_kses() CSS workarounds. Update your sites soon if auto-updates aren't enabled.
Ryan Welcher compiled What's new for developers (July 2026), and it's all about the 7.1 cycle getting real: Beta 1 lands July 15, final release August 19 at WordCamp US. You'll want to test responsive styling, the React 19 runtime flag, and Unicode email addresses now. Also on your radar: merge proposals for Core Abilities and Guidelines, the 40px component default, icons inheriting color, and Playground's MCP support.
 The latest episode is Gutenberg Changelog #131 - Gutenberg Plugin Releases 23.1 - 23.3, Calls for Testing for 7.1 and more

Berislav "Bero" Grgičak announced what's new in Gutenberg 23.5, released July 1. The headliner: you can now drag the editor canvas to any width, with the device preview dropdown and resize handles working together for responsive editing. The experimental Media editor gains a magnified crop canvas, pixel-snapping handles, and Cover block support. Also notable: text shadows in Global Styles, flip and rotate controls for the Icon block, and a minimum WordPress version bump to 6.9.
For the next episode of the Gutenberg Changelog, I sat down with Ellen Bauer to chat about what's coming next for WordPress. We dug into the latest Gutenberg plugin releases (23.4 and 23.5) and the recent WordPress 7.1 update. Plus, we walked through some big merge proposal, like the Design System Theming. our excitement around responsive styling coming to WordPress. It's a packed episode full of news you won't want to miss! The episode will land in your favorite podcast app over the weekend.

WordPress 7.1 roadmap and more calls for testing
Anne McCarthy published Roadmap to WordPress 7.1., scheduled for August 19, 2026. Longstanding styling gaps are being tackled: responsive styling and interactive-state styling let you adjust blocks per viewport or on hover - no custom CSS required. You'll also find new Playlist, Table of Contents, and Tabs blocks, a smarter command palette, a Design → Identity screen, the admin bar inside the editors, a media editor modal, and expanded Unicode support for email addresses.
Also mentioned Real-time collaboration, Knowledge Guidelines, React 19 upgrade, Classic block deprecation have been punted since the posts came out. Beta 1 arrives July 15 and will settle which of the other Roadmap features are in and which will be punted to a future release.
The latest Weekend Edition listed three calls for testing. Meanwhile, two more came online:
Nikunj Hatkar, this year's team rep of the Core Test team, posted a call for testing responsive styling. You'll be able to style blocks differently for tablet and mobile right in the editor - no custom CSS or media queries needed. The underlying PR unifies the resizable canvas with the device-preview switcher. Fire up the linked WordPress Playground instance, walk through the four test scenarios, and share what feels intuitive or broken. Plugin and theme developers should test their canvas integrations, too.
Dennis Snell published a call for testing Unicode email addresses. With initial support merged, is_email() and sanitize_email() now accepting non-ASCII addresses like grå@grå.org, and validation aligns with the Web Hypertext Application Technology Working Group (WHATWG) spec. You'll want to check your plugins and themes: the new WP_Email_Address class gives you structured access to local and domain parts, and a snippet lets you disable Unicode support until third-party integrations catch up.
Three Merge Proposals
Core contributors put together three merge proposal for new features to be added to Core for public comment.
Jorge Costa published a merge proposal to expand WordPress Core Abilities in WordPress, adding three read-only abilities covering settings, content, and users. Building on the Abilities API from 6.9, they give the AI Client real tools to call, so agents can understand your site's configuration, posts, and people. Settings and post types opt in through a dedicated flag, and management abilities are planned for a later WordPress version.
Greg Ziółkowski published a merge proposal for Guidelines built on Knowledge, a new custom post type headed for WordPress 7.1. Knowledge gives your site one shared home for standards, memories, and notes - with revisions, capabilities, and REST access built in. Guidelines is the first feature on top, letting you capture voice, tone, and per-block rules right where writing happens. Although, originally aimed at WordPress 7.1, in their latest comment, Anne McCarthy indicated that it needs to simmer some more before it's considered for inclusion in WordPress Core.
Andrew Duthie published a merge proposal for Design System Theming, bringing design tokens and a new theme component to WordPress. Built by the Gutenberg Components Team, it turns hard-coded admin styles into CSS custom properties, so your plugins and screens stay consistent and accessible. A color ramp tool generates harmonious, accessible scales from just two seed colors, and the user color scheme reaches the Site Editor - with dark mode on the horizon.
Plugins, Themes, and Tools for #nocode site builders and owners
Anne Katzeff published a tutorial exploring the WordPress Cover Block for parallax scrolls. You'll learn how the Fixed Background setting turns a Cover block into a layered parallax effect - background, middle ground, and foreground text moving at different speeds. The post steps through nesting a second Cover block, switching which layer scrolls, and improving text readability with grouped backgrounds. A video tutorial rounds it out. She also demos her process in this YouTube video.
Carrie Dils shared a case study, One Header, Two Themes, on phasing a legacy Elementor site toward Full Site Editing without a rebuild or content freeze. Using ThemeSwitcher Pro to run two themes side-by-side, she built one shared header in a plugin that both themes render. You'll learn from five real-world snags - WooCommerce's hooked blocks, cascade conflicts, routing gaps, query-string bypasses - and why shipping the shared layer first de-risks everything after.
Gina Lucia compared WordPress block themes vs page builders on the Ollie blog. You'll get a clear-eyed walkthrough of what classic themes, page builders, and block themes each handle - scope, design control, performance, lock-in, and maintenance - with side-by-side tables. Her conclusion: block themes combine sitewide design control with visual editing natively, so you rarely need a page builder anymore, though migration costs and team habits can justify keeping one.
Elliott Richmond explained why he spent 16 months turning 400+ holiday cottages into WordPress blocks. The kate & tom's site moved from ACF flexible content to a native block theme, freeing the marketing team from waiting on custom widgets. You'll appreciate his candor: 10,590 widgets migrated via a purpose-built plugin, re-run against fresh production snapshots, with flaky conversions fixed by hand. Even untuned, PageSpeed jumped from 22 to 67.
Wes Theron published a video tutorial, How to Create and Edit Navigation Menus in WordPress, for anyone getting comfortable with block themes. In under ten minutes, you'll learn how to edit your menu with the Navigation block, add pages, posts, categories, and custom links, and build dropdown menus. Timestamps let you jump straight to the part you need - handy if dropdowns are the only thing standing between you and a finished header.
Theme Development for Full Site Editing and Blocks
Henrique Iamarino shared how the Automattic Design team built a WordPress theme without ever opening Figma. You'll follow the making of Crafted, a production-ready theme created almost entirely in the WordPress Editor: Global Styles for typography and spacing, Create Block Theme to save edits to theme files, WordPress Studio for local review, and an AI assistant for finishing-touch hover CSS. His takeaway: the Editor is now a professional design surface.
Justin Tadlock explained how to dynamically load template parts in block themes on the Developer Blog. Instead of maintaining a pile of near-identical templates, you can hook into the render_block_data filter and swap a template part's slug on the fly - say, a different sidebar per post category. His walkthrough covers early returns, fallback behavior, and file setup, and the technique works for headers, footers, and banners, too.
AI and WordPress
Jeff Paul announced what's new in AI 1.1.0, the latest release of the canonical AI plugin. Two experiments headline, type-ahead text suggests inline ghost text as you write in the block editor, and key encryption secures your AI Connector API keys in the database. You'll also find smarter content readiness checks with locale-aware counting, more control over guest comment moderation, a new core/read-settings Ability, and a peek at 1.2.0 plans.
Questions? Suggestions? Ideas?
Don't hesitate to send them via email or
send me a message on WordPress Slack or Twitter @bph.
For questions to be answered on the Gutenberg Changelog,
send them to changelog@gutenbergtimes.com
11 Jul 2026 1:37am GMT
10 Jul 2026
WordPress Planet
Open Channels FM: The Real Challenge of Technological Solutions: Exclusion in the Age of Verification
David Snead, director of the Secure Hosting Alliance and a long-time Internet policy leader, shares his perspective on the complexities that emerge when technological solutions like age verification are implemented in the digital infrastructure space. Dave's reflection highlights how the push for more secure, regulated environments can unintentionally create barriers for vulnerable or less tech-savvy […]
10 Jul 2026 2:34pm GMT
Dennis Snell: See DATA, CDATA, RCDATA, and PCDATA oh my!
HTML and XML are markup languages based on plaintext files. This means that any given character could be part of a syntax form (a tag, a comment, a character reference, etc…) or it could be representing itself the way it reads in the file literally.
<tag>· Text node</tag>Whenever a character might be ambiguous, both languages require explicit indication of the intent of the character. In HTML this occurs via escaping, while XML allows escaping or wrapping the content in a marked section, specifically a CDATA section.
<tag><![CDATA[<tag>· Text node</tag>]]>These terms confuse me at times, especially since CDATA and CDATA sections are distinct forms of the same content, and it's easy to conflate each term. This post is here to disambiguate the terms, their meanings, and why they exist.
The punchline comes at the end, but the story is hopefully worth the read.
Markup and mixed content
One of the first jobs of a parser for any plaintext-oriented format is to determine if the next input character represents real text or is part of a syntax form that carries special meaning. If it's a syntax form we would call it markup, but if the characters are part of real text meant for display or rendering or reading then we call it data.
Anything that is not syntax is data.
The interpretation of the next character depends on the region of the document in which it's parsed. While the rules for syntax forms are complicated1, this post will focus on the data forms.
PCDATA - "parsed character data"
May form: tags, comments, sections, character references, literal text.
Characters in this region could be data or could form the start of a new markup element. It's "parsed" because it needs parsing before determining what it represents.
The HTML specification renames this to Data, which is simpler and a bit harder to search for. In XML, however, it's used in a document-type definition (DTD). When an element may contain content - text - its data model must include #PCDATA. Otherwise the only characters allowable within that element are other elements, comments, and whitespace. XML documents are required to be valid SGML documents, so its own specification adopts the terminology from SGML's.
Those who have worked with DTDs might note that elements in XML may contain #PCDATA while attributes contain CDATA instead. First of all, the # is there only to make it explicit that PCDATA is referring to the reserved keyword, rather than a <pcdata> element. Secondly, there's a good reason for this, which is that attributes can only contain text - they can't contain other elements of markup. If an attribute value could contain a <span> element, for example, then the attribute value would need to be #PCDATA instead, but this is prevented by design.
PCDATA actually contains more than just literal text and elements. In addition to comments, processing instructions, and other node-like syntax, one important feature of PCDATA is the character reference. These make it possible to represent characters that would conflate with syntax (such as '<' - <) or which might be cumbersome to enter on a keyboard (such as '§' - §). When parsing, each character in these sequences neither creates an element nor displays as the text itself; rather, the entire sequence is parsed and translates into the character it refers to.
HTML pre-specifies a fixed set of named character references, but any Unicode code point may be referenced by its decimal or hexadecimal numeric index. While XML also allows referencing code points by their index2, it only pre-specifies the five named characters which correspond to its main markup introducers: <, >, &, ', and ". In XML, any additional named character references are created through the DTD by defining entities.
CDATA - "character data"
May form: [character references], literal text.
If a character isn't markup, then it's character data, which means that it's representing its literal self or it's part of a character reference. Once the parser has entered this region it will not create markup elements.
CDATA is the most confusable kind of character data; this is because there are many kinds of CDATA that share the same name:
- XML attributes may contain CDATA, where character references are decoded.
- XML CDATA sections only contain CDATA, but character references are not decoded.
- HTML kind of has the same CDATA sections, but only in foreign elements (inlined SVG and MathML elements).
- SGML elements may be declared to have a CDATA content model, in which case all content until the appropriate closing tag is to be parsed as character data, where character references are not decoded.
CDATA sections contain only literal text
Many people are familiar with CDATA sections, but it took me far longer to understand them than my intuition led on. They are the vestige of SGML "marked regions" which tell the parser to handle a specific range of bytes in a special way. The CDATA section is one of those, which tells the parser to completely turn off until it reaches ]]>.
<![CDATA[literal characters only in here]]>It had other marked sections, however, which served different purposes.
<![IGNORE[everything in here is ignored; it doesn't exist.]]><![INCLUDE[in here things <em>do</em> exist as normal.]]><![RCDATA[read on to learn about RCDATA!]]>The IGNORE and INCLUDE sections may seem strange, since SGML already has comments, and INCLUDE effectively does nothing, but the sections can be marked by replaced entities, making for conditional inclusion which can be overwritten via command-line arguments when invoking the SGML parser.
<!ENTITY % review-only "IGNORE">...<![%review-only;[<aside>Add `-Dreview-only=INCLUDE` when building drafts.This note won't appear otherwise.</aside>]]>XML only retained CDATA sections from SGML, while HTML never included them. They are useful because they are so easy to parse. All characters inside of them are to be treated as literal text, up until the first occurrence of the terminating ]]>. Unlike elements, the marked sections do not nest.
There are no CDATA sections in HTML
The Internet is full of discussions about the use of CDATA sections in HTML, but there are no such things, mostly. HTML itself is an amalgam of pure HTML and embedded SVG and MathML. Content inside of those embedded SVG and MathML elements is parsed differently, and within this "foreign content" there are CDATA section nodes.
When something which look like a CDATA section appears in an HTML document, it's transformed into a "bogus" HTML comment and considered a snippet of malformed markup. To make things more confusing, the parsing rules differ inside an HTML document for these regions depending on whether they are found within HTML elements or foreign elements.
- When a real CDATA section appears within SVG and MathML, it parses as in XML or SGML - everything is literal text until the nearest
]]>. - When a malformed CDATA look-alike appears in an HTML element, it gets special treatment - the parser only turns off until the nearest
>. This means that these sections end even without a closing]]>, and when they do, all of their contained content disappears from the page.
That small difference confuses naïve parsers and is a regular source of bugs.
<div><![CDATA[There are no tags in here.]]></div><svg><text><![CDATA[<none> here either.]]></text></svg><div><![CDATA[But there <em>are</em> tags in here]]></div>the section ends here ╯ ╰ start of a real end tagThe following is the equivalent markup to the third line.<div><!--But there <em-->are</em> tags in here]]></div>SGML contains CDATA regions outside of marked CDATA sections
SGML made it possible to define more kinds of content than XML does for a given element. For example, an element in SGML can be declared to have a CDATA content model, in which case the element itself behaves like a CDATA section. All characters after the opening tag are treated as literal text until the parser finds the nearest appropriate end tag3. XML rejected this ability because it increases the complexity of the parser and requires that every document also contains a full DTD when parsing. For example, if an element were declared to have CDATA content, then a <at> b would represent that literal string; on the other hand, if it were declared like any other normal element, it would have three children: "a ", the <at> opening tag, and " b".
<!ELEMENT verbatim - - CDATA>...<verbatim>There are <no> tags in here, because this is CDATA,but you wouldn't know without reading the DTD,overcomplicating the demands on the parser.</verbatim>These kinds of elements do exist in HTML, though a few were modified when HTML5 was standardized in 2008. Inside of the elements, the parser essentially turns off, which makes them easy to parse and can help avoid the need to extensively escape content. These elements are, of course, <script> and <style>4.
Were it not for the CDATA declared content model, every angle bracket and ampersand would have to be escaped in included JavaScript and CSS. In XHTML this was required, because it had no CDATA declared content model (since it was XML)5.
All text in XML is CDATA
Herein lies the most-confusing aspect of discussing CDATA - XML contains CDATA sections as well as CDATA as normal text. After parsing there is no distinction between <tag> and <![CDATA[<tag>]]> in the parsed content.
Many XML generators (or serializers) provide two mechanisms for creating text content: one wraps text in a CDATA section and leaves the text as it came (apart from avoiding including the terminating sequence); the other escapes syntax characters instead. While there are times where it would be appropriate to intentionally pick one over the other, a good library design would at least offer a third mechanism (if not only providing this third mechanism) which simply produces CDATA, itself determining when to wrap and when to escape6, and whether or not to produce chunks of wrapped text interspersed with chunks of escaped text.
The real difference between these two kinds of CDATA is purely presentational in the source document, as the XML snippet below only contains one text node, not two. Creating CDATA does not imply creating a CDATA section!
<rule><![CDATA[#X13<d&r>]]> (&pp;4 &ss;3.11)</rule>RCDATA - "replaceable character data"
May form: character references, literal text.
There's one more confusing designation for characters in the HTML and XML input streams: RCDATA. RCDATA is almost identical to CDATA, except that in contexts where CDATA does not decode character references and entities, RCDATA will decode them into CDATA. This is confusing, because in the context of an XML attribute, the CDATA designation in a DTD automatically implies that character references are decoded, unlike the CDATA sections in content.
To this end there are no RCDATA attributes, since character references are always decoded inside attribute values. The RCDATA declaration is like the SGML CDATA content declaration: all characters following the opening tag for this element will be treated as text until the nearest matching closing tag (the difference being only that character references are recognized and decoded).
It's worth remembering that XML rejected the CDATA content type because of how it complicates parsing, and it also rejected the RCDATA type. On the other hand, RCDATA was incorporated into HTML, but statically so. HTML has no configurable DTD, but in its specification two elements contain RCDATA content:
TITLETEXTAREA
While it's easy to comprehend the way that <textarea> works, and that's probably because we are used to entering text into one on a web page, the behavior of <title> is consistently confused in all manner of programming languages, platforms, and HTML-parsing code.
The TITLE element only contains character data - it cannot contain other markup. The parsing is among the easiest sections of an HTML document to parse: once the <title> opening tag is detected, the parser can capture everything until the nearest </title> closing tag. Everything it captured is literal text, after decoding character references.
<!-- the title is "<title>" --><title><title></title><!-- equivalent HTML --><title><title></title>This complicates content management systems like WordPress which allow posts to have HTML in their post titles, because a page can show richly-formatted article titles which cannot be represented in the browser tab's label, and care must be taken to extract the plaintext content from that HTML before display in those contexts.
Coda
HTML and XML both speak about different kinds of characters in their source documents and content models, which traces from the complicated ways that SGML documents could be constructed. SGML's complexity almost always stems from the central idea that computers should do extra work to remove the hassle for humans to enter structured content in plaintext documents.
HTML, inspired by SGML, adopted some of the names and mechanisms for parsing those regions of text in distinct ways, but codified a single parsing standard independent of SGML. When XML was later developed, it was meant to form a simplified subset of SGML. This subset flipped the tradeoffs, leaning on humans performing extra work to remove the hassle for computers to parse structure in plaintext documents. For these text forms, this meant rejecting a few of the constructs while retaining others.
This is also another demonstration of how balanced tags are not enough to have well-behaved HTML with a naïve parser. A well-formed XML document may be parsed with a terse PERL script and regular expression, but HTML relies heavily on the context in which characters are found. Any HTML parser must know the special rules for each kind of element's content model.
In summary
When it's unclear whether a character forms text or markup, that is PCDATA. Once parsed, there is no PCDATA anymore; it's either a form of DATA or MARKUP.All text nodes in HTML are "DATA.""CDATA" just means "character data" and means that after parsing, the content is text. It does not indicate whether character references are to be decoded or not; that comes from the region in the document, based on its context.There are no CDATA sections in HTML7.All text nodes in XML are CDATA, but only after being parsed.CDATA sections offer a convenient way to avoid escaping, but are indistinguishable from the equivalent escaped text.HTML contains two special RCDATA elements which only and always contain a single text node child:<title>and<textarea>. Everything until the closing tag will be parsed as text, even if it looks like markup.
This post is already long and still over-simplifies the picture. SGML is a rich and robust specification and includes NDATA and SDATA, HTML includes a latching PLAINTEXT parsing mode in which the rest of the entire document is parsed as literal character data, and there are other surprising goodies in how entities interact with the character mode.
Thanks for making it through to the end, or jumping directly here if you couldn't wait.
- As an example, each part of a tag - its name, attribute names, attribute values - carries its own parsing rules. The same is true for comments, DOCTYPE declarations, and every other syntax form.
 ︎
︎ - XML only allows character references to the characters in its "character set," which is almost all Unicode code points, but excludes some control characters and U+FFFE and U+FFFF. ︎
- Because SGML was designed to minimize the amount of necessary syntax, it's not necessary to have a full end tag for an open element, but that's a simple-enough model to understand the concept. ︎
- The
<style>element is straightforward, but the<script>element has its own complicated modification of the CDATA content model. It's mostly CDATA, but makes it possible to escape the closing tag so that very old pages won't break. HTML also applies this parsing mode for the<iframe>,<noembed>,<noframes>, and<noscript>elements (as well as for the deprecated<xmp>element), but these nominally should have no content inside of them (or shouldn't be used); applying the CDATA content model prevents creating other elements as their children.︎ - Frustratingly, in XHTML one must escape JavaScript and CSS in the page to avoid parsing failure, while in HTML one must not. This alone makes for a complicated stage in any reliable HTML/XHTML converter. ︎
- Wrapping a language like HTML inside a CDATA section is a convenient way to represent the HTML visually and retain the ability to easily modify it, but entities present a problem. The serializer must either pre-translate the entity into its resolved character content, losing the macro-like behavior and its name; or leave the entity in place, thus nullifying it because it will not be recognized as an entity on parse. However, in such a situation, a serializer is free to terminate the CDATA section, append the entity, and open a new one to continue. ︎
- As mentioned in the discussion about CDATA, embedded SVG and MathML elements can contain CDATA sections, but these are not technically HTML elements. ︎
10 Jul 2026 11:07am GMT
Gutenberg Times: WordPress 7.0.1 Fixes Registration Spam, wp_kses() CSS Corruption, and 7.0 Admin Design Glitches
WordPress 7.0.1 is now available. As the first maintenance release of the 7.0 cycle, it's strictly a bug-fix release: every included ticket addresses either a regression introduced during 7.0 development or an issue intentionally deferred at the end of the cycle.
The release ships fixes for 17 core Trac tickets and 14 Gutenberg PRs. Because this is a maintenance release, sites with automatic background updates enabled will update to 7.0.1 automatically - everyone else should update as soon as possible. Here's what stands out for each audience.
Kudos to release lead Aaron Jorbin and his team for pushing this release over the finish line and getting it into hands of WordPress users quickly.
The most important fixes for end users
Registration page spam is shut down (#63085). The account registration page could be abused to send "Login details" spam emails from your site. This is arguably the most impactful fix in the release for anyone running a site with open registration - it protects both your users' inboxes and your domain's email reputation.
The 7.0 admin reskin gets its rough edges sanded off. WordPress 7.0's refreshed admin design shipped with a handful of visual glitches that this release cleans up:
- Form elements are now standardized in the mobile viewport (#64999)
- The image editor's scale and crop inputs no longer mismatch in size, and the info icon uses the new color scheme (#64937, #65428)
- The publish settings panel no longer crowds its primary action buttons together (#65286)
- The Media Library's loading spinner is properly aligned in the modal filter toolbar, and the search bar no longer jumps position after a search (#65275, #65296)
- A "black flash" that briefly appeared on wp-admin pages before the interface finished loading is gone (Gutenberg #78493)
Emoji behave correctly again. Two related fixes: the emoji detection script is once more printed in the admin (#65310), and certain characters are no longer incorrectly replaced by Twemoji images (#64318).
Accessibility improvements to the new revisions experience. The Visual History / Revisions feature introduced in 7.0 receives several accessibility fixes: focus now moves to the revisions slider when entering revisions mode, and changed blocks are marked with a CSS outline as a secondary, non-color indicator - important for users with low vision or color blindness (#65122, Gutenberg #77530, #78393, #79691).
The most important fixes for developers
wp_kses() no longer corrupts valid CSS (#65270). Since 7.0 RC4, wp_kses() could mangle legitimate background-image: url(…) declarations into a broken style=")" attribute. If your theme or plugin outputs inline background images through KSES-filtered content, 7.0.1 restores expected behavior - any workarounds you shipped can now be removed.
global-styles-inline-css can be dequeued again (#65336). Since 7.0, developers were unable to remove the global styles inline stylesheet. If your build pipeline or performance optimization strips this and re-serves it another way, that control is back.
PHP 8.5 compatibility fix in wp_get_attachment_image_src() (#64742). An incorrect array access triggered issues under PHP 8.5. If you're testing sites on newer PHP versions, this removes one blocker.
A removed Navigation function returns as a deprecated shim (Gutenberg #78484). block_core_navigation_submenu_render_submenu_icon() was removed in 7.0, breaking themes and plugins that called it directly. It's restored as a deprecated shim - but treat this as your migration notice, not a reprieve. Update any code that references it.
Editor state management fixes reduce false "unsaved changes" warnings. Two Gutenberg fixes matter here:
- controlled/mode block changes are now marked non-persistent (#79350), and
- related navigation entities are no longer dirtied during passive renders (#79000).
Together these should mean fewer spurious dirty states and a cleaner undo history - a quality-of-life improvement if you build with template parts and navigation blocks.
Block Visibility: "hide everywhere" keeps working after a block opts out of visibility support (#65389). If you register blocks that disable visibility support, previously hidden instances now stay hidden as expected.
How to update
You can update directly from Dashboard → Updates in your site's admin, run wp core update with WP-CLI, or download WordPress 7.0.1 from WordPress.org and install it manually. Sites that support automatic background updates for minor releases will begin updating on their own shortly.
The full ticket list is available in the release candidate announcement, Trac report 4, and the 7.0.x editor tasks board on GitHub.
What's next: WordPress 7.1
With 7.0.1 out the door, attention turns to the next major release: WordPress 7.1 is scheduled for August 19, 2026. To see what's planned for the release, check out the Roadmap to 7.1 on the Make WordPress Core blog.
10 Jul 2026 9:34am GMT
09 Jul 2026
WordPress Planet
WordPress.org blog: WordPress 7.0.1 Maintenance Release
WordPress 7.0.1 is now available!
This minor release includes fixes for 31 bugs throughout Core and the Block Editor, addressing issues affecting multiple areas of WordPress including the block editor, admin ui, and media. For a full list of bug fixes, please refer to the release candidate announcement.
WordPress 7.0.1 is a short-cycle maintenance release. The next major version of WordPress will be 7.1; it is scheduled for release on 19 August 2026 at WordCamp US.
If you have sites that support automatic background updates, the update process will begin automatically.
You can download WordPress 7.0.1 from WordPress.org, or visit your WordPress Dashboard, click "Updates", and then click "Update Now". For more information on this release, please visit the HelpHub site.
Thank you to these WordPress contributors
This release was led by Aaron Jorbin, Brian Haas, Carlos Bravo and Estela Rueda.
WordPress 7.0.1 would not have been possible without the contributions of the following people. Their asynchronous coordination to deliver maintenance fixes into a stable release is a testament to the power and capability of the WordPress community.
Aaron Jorbin, Abdur Rahman Emon, Abhishek Kumar, Adam Silverstein, Adam Zieliński, Aditya Singh, Aki Hamano, Andrea Fercia, Andrei Draganescu, Andrew Serong, annezazu, Ben Dwyer, Brian Coords, Brian Haas, Carlos Bravo, cogdesign, Dan Luu, Daniel Richards, Darshit Rajyaguru, David Baumwald, Dennis Snell, Dhruvang21, Ella Van Durpe, Erick Wambua, Esteban, Estela Rueda, George Mamadashvili, Greg Ziółkowski, Himanshu Pathak, Hit Bhalodia, Huzaifa Al Mesbah, iflairwebtechnologies, James, Jarda Snajdr, Jb Audras, Joe Dolson, Joen Asmussen, Jon Surrell, Jonathan Desrosiers, Karthikeya Bethu, Khokan Sardar, Lucian R., luismulinari, Mahammad Darvishov, Manhar Barot, Marco Ciampini, Marin Atanasov, Maryam Sultana, Masum, Miguel Fonseca, Miroku, Mohammed Noumaan Ahamed, Mukesh Panchal, Mustafa Bharmal, Nik Tsekouras, Noruzzaman, Ozgur Sar, Peter Wilson, Presskopp, Rahul Kumar, ramonopoly, Riad Benguella, Rishabh Gupta, Roshni Ahuja, Sainath Poojary, Saksham Sharma, SAndrew, Scott Reilly, Sergey Biryukov, siliconforks, Stephen Bernhardt, Swanand M, Takashi Kitajima, Terence Eden, threadi, Tushar Patel, Umesh Nevase, WebMan Design | Oliver Juhas, Weston Ruter, Yogesh Bhutkar, Yusuf Mudagal
How to contribute
To get involved in WordPress core development, head over to Trac, choose a ticket, and join the conversation in the #core channel. Need help? Check out the Core Contributor Handbook.
Props to @jorbin for proofreading.
09 Jul 2026 5:33pm GMT
Open Channels FM: The Paradox of Empowerment in a Disruptive Era
Tech feels wild and unpredictable, yet super empowering. Success now hinges on broad awareness and curiosity, not just deep specialization. Embrace the chaos.
09 Jul 2026 3:24pm GMT
Jonathan Desrosiers: 13 Years Contributing to WordPress
Thirteen years ago today, I received my very first props for contributing to WordPress Core. If my WordPress contribution journey were a person, it would now be a teenager. It's pretty wild to think about, but I've now been contributing to the WordPress project in some way for a third of my life!
What is a "prop"?
In the WordPress open source project, community participants receive credit for contributing to a given change or deliverable by receiving "props."
Props should be given to all those who contributed to the final commit, whether through patches, refreshed patches, code suggested otherwise, design, writing, user testing, or other significant investments of time and effort. Usernames are parsed for the credits list and WordPress.org profiles.
The names of all the contributors who helped make a specific release possible are collected in the weeks leading up and added to the Credits API, which powers the Credits page in the WordPress dashboard.
To date, I have been listed on the Credits page for 24 consecutive releases starting with 4.7, and 29 of the 35 releases overall since my first credited contribution in WordPress 3.6 "Oscar", alongside 224 other contributors.
Every year is a bit different than the last, but I can confidently say that this past year has been significantly different. What it means to develop software or contribute to open source is changing rapidly with advanced AI innovations seemingly every day combined with these tools being accessible to more people than ever before. But throughout all this, one truth holds strong: open source software is more important than ever.
Looking Back
It seemed only fitting for me to instruct AI to analyze my contribution activity over the last 365 days to try and find anything interesting!
Prompt
Today is the 13th Anniversary of my first credited contribution to the WordPress project. I try to write a blog post each year to mark the occasion.
I'm looking for ideas for this years edition. Please go and read all of my past posts (accessible here at this category feed https://jonathandesrosiers.com/category/contributing-anniversaries/feed) and give me 10-12 ideas for what to focus on this year. You can also look through the other content on my site for other ideas.
After you do that, I want you to look at the git history for the
wordpress-developandgutenbergrepositories between July 8, 2025 and yesterday (July 7, 2026). I want you to parse the logs to summarize my activity and find some particular ways to analyze the data that are interesting.Be creative! These posts are the most fun when I am able to find some unique insight into a year's worth of contributions.
Results
Your year 13 in numbers (Jul 8 2025 → Jul 7 2026)
| Metric | Value |
|---|---|
| Core commits authored & committed | 119 (~7% of all 1,707 core commits this cycle) |
| Additional commits crediting you (props received) | 97 → ~216 credited touch points in core alone |
| Lines changed | +41,746 / −21,940 across 656 file-changes |
| Unique Trac tickets | 69 |
| Gutenberg PRs authored | 24 (+108 co-authored/credited) |
| Reverts you committed | 6 |
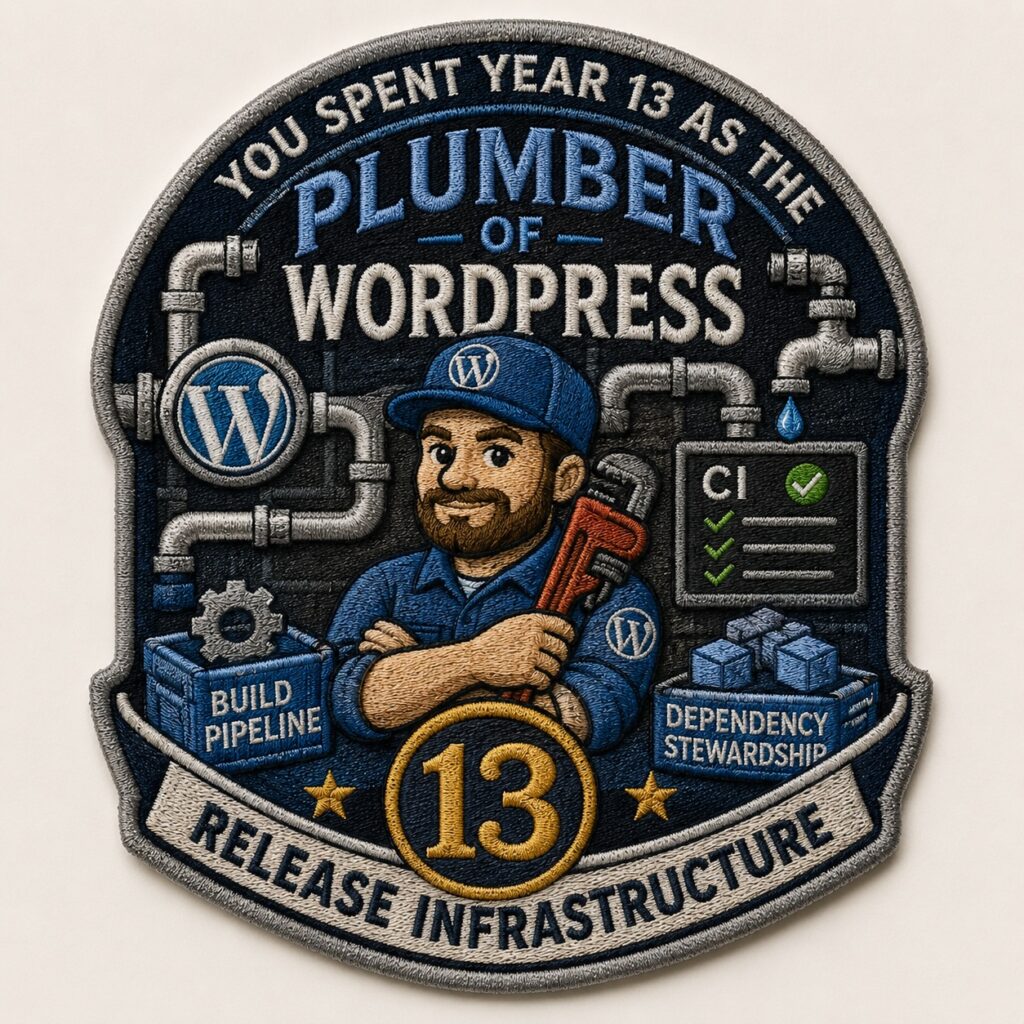
The headline: 80 of your 119 core commits (67%) are "Build/Test Tools." Add Tests + General and it's ~80%. You spent year 13 as the plumber of WordPress - CI, build pipeline, dependency stewardship, release infrastructure.
The most interesting angles the data surfaced
- The nocturnal committer. ~50 of your commits land between midnight and 4am. Tuesday (37) and Thursday (31) are your peak days; Saturday is nearly dead (3).
- The month that didn't exist. January 2026: zero commits. March 2026: 40. Your cadence is a heartbeat synced to the 6.9 and 7.0 release cycles, not the calendar.
- The June 30th ritual. You bumped Gutenberg's pinned hash seven times in a single day (v22.8.0 → v23.4.0) - a whole quarter of catching-up compressed into one sitting.
- Supply-chain quiet work. Pinning full-length action SHAs, replacing abandoned third-party actions, migrating release logic to a GitHub App, ca-bundle updates - you spent the year hardening the software supply chain nobody thanks you for.
- Keeping the ancient libraries breathing. lodash, underscore, backbone, getID3, Twemoji - you're the caretaker of WordPress's legacy vendored code.
- Future-proofing the matrix. MySQL 9.5/9.6/9.7, MariaDB 12.1, PHP 8.5 (HEIF/HEIC) - you test tomorrow's platforms today.
- A first, quietly historic commit: "Include example for disclosing AI usage" - you helped write core's early AI-disclosure norms.
10-12 ideas for the year-13 post
- "The Plumber's Year: 67% of My Commits Were Infrastructure." Own the unglamorous. A love letter to build/test/CI work - the contributions that never show up in a release announcement but without which nothing ships. This is your strongest, most authentic angle.
- "Confessions of a Nocturnal Committer." Fun, human, data-driven: your midnight-to-4am commit cluster, Tuesday/Thursday peaks, the dead January. Chart your year as a heartbeat and reflect on what it says about maintainer rhythms (and sustainability/burnout).
- "216 Times." Companion to your 2024 props post, flipped: this year you received credit ~216 times in core (119 committed + 97 propped). Explore the two halves of a committer's fingerprint - the work you land yourself vs. the work you shepherd for others.
- "The Boring Commits That Keep 40% of the Web Safe." The supply-chain security angle: pinned SHAs, abandoned-action replacement, the GitHub App migration, ca-bundle. Frame maintenance-as-security - timely and underappreciated.
- "I Test the Future So You Don't Break in It." MySQL 9.7, MariaDB 12.1, PHP 8.5 - a piece on being the person who runs tomorrow's platforms against today's code, and why the test matrix is a form of care.
- "The Commit I'm Proudest Of Was One Line About AI." Use "Include example for disclosing AI usage" as a springboard into how WordPress (and you) navigated AI's arrival in the contribution workflow in 2025-26. Very of-the-moment.
- "Anatomy of a Revert." Six times this year you reverted your own or others' work. A candid, senior-contributor essay on why reverting is a feature not a failure - iteration, humility, and trunk stability.
- "A Year in Dependencies." The stewardship story - lodash/underscore/backbone/getID3/Twemoji. What it means to be the caretaker of code written a decade ago that you can't just delete. Legacy as responsibility.
- "Who I Built With." Refresh your collaborator lens for year 13: westonruter (24), jorbin (22), johnbillion (15), peterwilsoncc (14), wildworks (13)… Name the people behind the props lines and tell a story or two about the work you shared.
- "The Shape of a Release Cycle, Drawn in Commits." Overlay your monthly commit counts on the 6.9 and 7.0 timelines - the March spike, the December bundled-themes push, the quiet stretches. Show readers what a maintainer's year looks like mapped to what shipped.
- "Same Job, New Tools: Automating Myself Out of the Loop." Your Gutenberg PRs are almost all release automation - GitHub App auth, GHCR publishing, reproducible builds, Dependabot. A reflective piece on spending your labor building the machine that does the labor, and what that means for the next generation of contributors.
I haven't validated any of these numbers, but they do seem relatively accurate at first glance. I had ChatGPT create an embroidered patch that reflects the summary above.
And some of those writing suggestions are pretty good ideas! I'm out of time for today, so I'll file these in the backlog for another day. But here's to another year of helping the world find their voice to share their stories using WordPress. 
Past Milestones
"Props" Anniversaries: Ten, Eleven, Twelve (archive).
Commit-iversaries: Two, Five, Six, Seven (archive).
Featured image credit: CC0 licensed photo by Mark Westguard from the WordPress Photo Directory.
The post 13 Years Contributing to WordPress appeared first on Jonathan Desrosiers.
09 Jul 2026 3:39am GMT
08 Jul 2026
WordPress Planet
Matt: Code for the People

Lights! Camera! Action!
Todd Spangler at Variety writes: Automattic's 'Code for the People' Documentary Is a Rallying Cry for Users to Fight for the Open Internet, from the NYC premiere last week.
I'm looking forward to the San Francisco premiere of the documentary, and then tomorrow everyone can stream it for free on codeforthepeople.com! Appearances by Anne McCarthy, Beau Lebens, Eric Binnion, Ian Stewart, Marjorie Asturias, Mary Hubbard, Matías Ventura, Matthew Miller, Paolo Belcastro, and Paul Maiorana.
We need to tell the story of Open Source in as many ways and places as possible. It's never been more critical.
Film is new to us, and it's funny how quickly things change: There's a segment with a few "OpenAI not open" sound bites, but to their credit, they have been releasing open-weight models (Safeguard is particularly interesting). That said, the top open-weight models are all from China, save for Nvidia's Nemotron, in ~12th place.
When I went to the first WordCamps in Beijing and Shanghai in 2009, it was a very different time. They were the biggest in the world at the time! I don't think you could take photos in Tiananmen Square as freely as I did then; now to visit I think you need an appointment, ID checks, and security checks.
Even during WordCamp, it felt like the freedom of Open Source was in high demand, but it also created a lot of fear. I found out later that one of the student volunteers who helped their professor organize everything had been taken in for hours of questioning following the event.
On that trip, I saw how fine-grained the Great Firewall could be when individual posts (IIRC, about bad milk from a factory harming babies) wouldn't load, but the rest of the site would. WordPress.com had been totally blocked, taking about a quarter of our traffic at the time, but behind the Firewall, Open Source continued to thrive and grow, and now the frontier open models are being driven by China in a way I never would have predicted!
Once you've had a taste of freedom, it's hard to go back.
08 Jul 2026 11:16pm GMT
WPTavern: #224 – David Snead on Building Trust and Collaboration in the Hosting Industry With the Secure Hosting Alliance
[00:00:19] Nathan Wrigley: Welcome to the Jukebox Podcast from WP Tavern. My name is Nathan Wrigley.
Jukebox is a podcast which is dedicated to all things WordPress. The people, the events, the plugins, the blocks, the themes, and in this case, building trust and collaboration in the hosting industry with the Secure Hosting Alliance.
If you'd like to subscribe to the podcast, you can do that by searching for WP Tavern in your podcast player of choice, or by going to wptavern.com/feed/podcast, and you can copy that URL into most podcast players.
If you have a topic that you'd like us to feature on the podcast, I'm keen to hear from you, and hopefully get you, or your idea, featured on the show. Head to wptavern.com/contact/jukebox, and use the form there.
So on the podcast today, we have David Snead. David has been involved in the hosting industry since 1999, starting out as legal counsel for one of the earliest shared hosting companies, and going on to work with over 50 others. He helped found the i2Coalition, serve as in-house counsel for cPanel and WebPros, and now leads the Secure Hosting Alliance.
If you're listening to this podcast, I'm sure that many of you will have worked closely with hosting companies. Perhaps you run an agency, or business, that depends on the reliability, ethics, and security of hosting providers. David is here to talk about cross-industry collaboration in the hosting world, specifically around improving security, professionalism, and communication between hosts.
The conversation focused on why, and how, the Internet Infrastructure Forum, or IIF, is building a framework for real-time intelligence sharing and abuse reporting, aiming to help the entire ecosystem detect and prevent attacks faster than adversaries can adapt.
David talks about the challenges hosting companies face, especially smaller ones, in keeping up with security, and how this evolving project hopes to ease this by sharing actionable, non-proprietary abuse information across registrars, hosting providers, DNS services, and more.
He discusses the growth of both the Secure Hosting Alliance and the IIF, the business case for collaboration, and the nuances of legal and technical information sharing across borders.
If you're in hosting, run a web agency, or just want to know how the backbone of the web is working to stay more secure and connected, this episode is for you.
If you're interested in finding out more, you can find all of the links in the show notes by heading to wptavern.com/podcast, where you'll find all the other episodes as well.
And so, without further delay, I bring you David Snead.
I am joined on the podcast by David Snead. Hello David.
[00:03:20] David Snead: Hello.
[00:03:21] Nathan Wrigley: Very nice to have you with us. David's got a really interesting background, and a really interesting, I'm going to use the word project. I don't know if that's the right word. It feels like it's got more solidity and it's got a lot more history than that. It's something which is, I think going, but we'll find out a little bit more about it. It's all about the hosting industry and trying to get hosts to, I guess communicate with each other in ways going forwards.
[00:03:44] David Snead: That is a part of it. There are really two goals and one is to level up the ethics and professionalism in the hosting industry. And the second is to facilitate more comradery and interaction among hosts. Something that folks felt occurred in the early 2000s, and with all the consolidation that occurred went away. And so that's something that we're also trying to facilitate.
[00:04:16] Nathan Wrigley: Okay. So given that we're going to be talking about hosting, I guess it's a good idea to paint your credentials and find out a little bit more about you. So a short opportunity to just tell us a little about you and your background in WordPress and hosting specifically, I suppose.
[00:04:29] David Snead: Sure. So I have been working in the hosting industry since 1999. As I often say, I was working in the hosting industry when hosting was cool. It is not so cool anymore. In fact most people don't really pay attention to it.
You know, and I started as a lawyer for a hosting company, and I was in-house counsel for a company that actually owned a hosting company and was one of the earliest hosting companies that specialised in shared hosting. And so I was their general counsel. And for some reason it stuck, and I've just kind of turned it into a career.
So after that I had a private practise as a lawyer and I worked with probably 50 different hosting companies, mostly writing policies that nobody ever reads, which makes me super fun at parties.
And then from there, my friend Christian Dawson and I formed the i2Coalition as a response to some legislation in the US that would've been kind of the death nail for internet providers. So we started the i2Coalition. I then went in-house for cPanel and worked at cPanel and WebPros for 10 years, and then started the Secure Hosting Alliance.
[00:05:52] Nathan Wrigley: Okay. So you've got all all the history. That's pretty good. You know, if we're going to talk about hosting.
[00:05:57] David Snead: All the hosting history in one person. That's kind of a very scary idea, no?
[00:06:02] Nathan Wrigley: But that's excellent. So do you still offer counsel? Is that still, so you haven't sort of sidestepped and do half of the week on a sort of more technical basis? It's still the legal side that you're involved in.
[00:06:13] David Snead: I do. Right now I'm doing mostly M&A work for, it's weird. So I don't know if anybody has ever said this to you before, but web hosting is kind of like the Hotel California. It's like, once you start in the web hosting industry, you never leave. And so I have all these clients from 15 years ago who are now running like little baby hosts, and they're talking to bigger hosts and they want to get acquired. So I'm doing some of that now. I am not writing any of the policies that nobody ever reads because that was just, I did that for too long.
[00:06:51] Nathan Wrigley: There were too many moments parties.
[00:06:53] David Snead: Yes, exactly. Yeah.
[00:06:55] Nathan Wrigley: Okay, so I'm going to read into the record the title and the blurb that went with the presentation that you are doing or done.
[00:07:02] David Snead: I did it yesterday.
[00:07:03] Nathan Wrigley: Okay, we'll get into that in a moment. So the title is coordinating the fight, cross industry collaboration, and the blurb goes as follows. WordPress hosting threats cross company lines. When one provider falls victim, the entire ecosystem suffers. This session explores how the Internet Infrastructure Forum, or IFF, enables hosting providers, registrars and registries to coordinate abuse response through real time intelligence sharing. Learn how operational collaboration helps responsible operators detect and stop attacks faster than adversaries can adapt. And why working together produces results no single provider could achieve alone.
When I read that, immediately was, yeah, that's a really sensible idea. Why are we separately, as hosting companies, I say we, I mean the hosting companies. Why are they all trying to do the same work over and over again, separately? When presumably this aspect of the work, the security bit is something they all have in common.
[00:08:05] David Snead: Right? So that's the fundamental question, right? So the IIF is a voluntary organisation that is made up of everyone in the infrastructure stack. So from registrars, registries, DNS providers, hosting providers, cloud providers, everyone in the stack. So it is facilitated by the Internet and Jurisdiction Foundation. They're based in Paris, and they're the actually the secretariat for it.
And what it's designed to do is create a common way for everyone who's in the infrastructure stack to share information about abuse and abuse issues. And it's one of the fundamental problems that you referred to is everybody is operating in a silo, right? And that's mostly because that's the way the internet is architected, right?
So the internet is architected, so it's distributed, right? Registrars and registries basically do their own thing with domain names. They might have a small hosting component or maybe a cloud component, but by and large, all they do is domain names.
Hosting providers probably resell domain names, but they're not part of that industry. And so how do they all coordinate? And that's what the IIF is trying to facilitate, is more information sharing among the participants.
[00:09:39] Nathan Wrigley: Well I imagine some of the hosting companies are probably fairly good. You know, they've got a giant customer base. Let's imagine hosting company X over there, they've got millions of customers. They've got a huge budget that they can put over to, let's say, security things. Well that's all well and good, brilliant. But then there are other companies who are much scrappier. You know, they maybe have only a few thousand customers. And so their budget for the exact same work is going to be reduced.
How will this work? Is it going to be like a subscription service basically? Will you have a membership, which is in some way equal to the number of clients that you've got? Will there be some expectation that, okay, we'll look at your revenue, your membership will be equivalent to a percentage of your revenue? How will that all work?
[00:10:20] David Snead: We don't know. This is a very early stage project. Right now we are in a prototype phase where we have just figured out what information folks should submit to the secretariat.
So the way it works is, you submit the information that you collect for a particular abuse issue to the secretariat, who then enriches it with all the other information that's been submitted and sends it to the right person.
So a great example is, let's say a registrar reported a phishing domain. They turn off the phishing domain and they have maybe a timestamp, an IP address where it was submitted from. They submit that to the secretariat, who then finds the hosting company who is providing the services for the hosting and says, this came in about this particular site. Can you take action on that? So that's the way it works.
Right now it's very early stage. It's in the first phase of a test, and we're going to look at whether the way we've architected it, or the way the group has architected it, actually makes sense.
[00:11:39] Nathan Wrigley: Is this going to be then a sort of slow on ramp whereby you bring a few companies in at the beginning, hopefully. And then one or two more and iron out the wrinkles, and then some more and some more? Because I imagine, if you just threw the switch, everybody's in, a lot could go wrong at that point. And I'm guessing there's going to be more of a slow on ramp.
[00:12:00] David Snead: So you've pointed out my particular frustration with the IIF, and the reason that the secretariat is moving slowly, right? So fortunately, or unfortunately, based on my cultural background, I'm just sitting here going, this needs to move faster. We need to have everybody involved, we need to have all the hosts involved, we need to have all the registrars and registries. And other folks who are a little bit more skilled in this type of work say, no, we need to figure out what we're doing and that requires a small number of people.
The phase that we're in right now is looking for more folks who are interested in sitting at the table and being part of the discussion. Particularly in the hosting industry and in the web design and marketing industry. Those are folks who don't generally participate in these kind of industry led collaboration exercises. And that's the reason that I'm at WordCamp, is to talk to web designers, marketing agencies about why they should participate in something like this.
[00:13:13] Nathan Wrigley: So this really isn't bound in any way to WordPress, is it? It just so happens that WordPress has a significant chunk of the internet, so this is a good place to start. But if you happen to be a, I don't know, Drupal user, or you're just into writing PHP code or whatever it may be, this is still applicable. There's no real WordPress layer to this. This is just a good place for you to come because, well, there's probably, what, 30 hosts, 100 yards away from us out there.
[00:13:37] David Snead: I know. And I haven't seen all of them yet.
[00:13:39] Nathan Wrigley: Yeah, there's work to do. But agnostic to any platform, basically.
[00:13:42] David Snead: It is completely platform agnostic, yeah.
[00:13:43] Nathan Wrigley: Okay. Okay, that's interesting. But WordPress is a, is certainly a good place to start.
Now, I'm imagining, if I was a hosting company and I was the chief executive, I definitely have some questions for you in terms of, okay, we're going to share our valuable intel with you, what are you going to do with that? How can we trust you? How do we know that the sharing is going to be done effectively and what have you?
So I guess really what I'm getting to is, what is the assurances or checks and balances that you, in the end, will hope to offer the host? That you can assure them that, look, if you hand us this body of work, you don't need to think about it again. You can trust us to do it honourably, effectively, collaboratively. You get where going.
[00:14:26] David Snead: Yeah, yeah. And I suspect that you wanted to be a lawyer at some time, because that's one of the issues that we're facing. Information that can be shared freely, as an example, in the United States, might not be capable of being shared so freely in the European Union, or in Brazil, or in India or someplace like that.
So one of the things that's being done, not by me, but by another group, another working group that's part of this, is analysing the legal issues around information sharing.
The information that's being shared, to answer the proprietary and confidentiality question, is not proprietary or confidential information. So it's things like timestamps, domain names, IP addresses for the initial abuse submission. Things like that that really don't indicate some sort of company confidential information. And it's further abstracted into xarf, which is a language that's used for abuse reporting, that we all can share. And so I think that the only thing that would be of concern is whether that information is personal information that's subject to jurisdictional restrictions around the world.
[00:15:48] Nathan Wrigley: Would the idea be that this organisation would do the remedial work? So is there any notion that, let's say for example, some sort of security problem was discovered by hosting company A over there, and they share that intel with you. Maybe the question is kind of asking, will you then appoint people to figure out what the patch is for that? Or is your idea just to, oh, red flag, we've got this problem, now you all know about it. Is it just information sharing as opposed to fixes?
[00:16:17] David Snead: Yeah, it's the latter. So the thing that we're solving for right now, so there's just one issue that, one abuse issue, that we're testing out and it's issues related to fake shops. And so the fake shop issue is the test abuse issue for the project, and where folks are sharing information. It's a particular problem right now with credentials harvesting. And so that's what we're trying to look at.
[00:16:43] Nathan Wrigley: And how has the conversations that you've had thus far, how have they gone? Has this been warmly received or are you facing a little bit of pushback?
[00:16:50] David Snead: So, look, I'll be very direct with you. If something isn't just an immediate threat to them, it's very difficult to conceptualise why you should participate. And I am pretty used to answering that question simply based on the political work that I do with the i2Coalition. But once you talk about, so let's use fake shops as an example. Fake shops, and you're providing services to fake shops, actually has an impact on your bottom line.
So if you are providing, let's say, payment processing to an entity that is running a fake shop, it very easily can make your credit card processing charges higher. It ends up eating bandwidth. It will tax your abuse resources.
One of the things that you referred to initially is, you know, larger hosts have a lot of money. I wouldn't say they have a lot of money, but they have more bandwidth to handle a vast fire hose of abuse issues. Most smaller hosting companies might only get five or six abuse issues in a month. But if you have a fake shop, that's going to generate a huge amount of abuse, and it's taking away resources that you can use to actually grow your business. So that argument actually is relatively persuasive in getting folks to pay attention.
I find that the business argument around abuse is a much more compelling discussion than kind of moral persuasion. I don't think moral persuasion works in the context of a community that is trying very hard just to keep their heads above water.
[00:18:42] Nathan Wrigley: It feels to me from what you've just said, and I could be reading too much between the lines, but it feels to me as if a good target audience would be smaller hosts to begin with, simply because they're probably going to be more receptive because they have less bandwidth themselves. And so would welcome anything that can make the burden of sharing this information easier. So 10 of the small hosts combined is, well, it's much bigger than each of them individually would be, whereas I suppose you'll have to get a critical mass of them on board until maybe some of the bigger hosts start to look at you with favourable eyes, let's say that.
[00:19:15] David Snead: Well, so we have some pretty large hosting companies who are participating. So as an example, both GoDaddy and Newfold are participating. But we also have smaller hosts. But I agree with you, the information that's being provided, particularly since it is actionable, realistic information that can be adapted for bespoke systems, is invaluable, right?
So if you only get five or six abuse complaints and you get an abuse complaint, and you can go to the secretariat and say, we got a complaint about this domain, and the secretariat says, here's what the registrar did. Here's what Cloudflare did. Here's the information they provided us. And you can use that to make a decision on how to address that problem. It saved you hours and hours and hours of research time.
[00:20:09] Nathan Wrigley: Technically speaking, what would the conduit of information both toward you and away from you look like? So if I'm hosting company X, how are you imagining that I will supply you with that information? But also, if I'm just looking for information from you on a daily, weekly basis, whatever it may be, how do I receive that? Is this like a, I don't know, a website or an API or?
[00:20:33] David Snead: It's an API. So it's a file. It's just a general file download.
[00:20:37] Nathan Wrigley: Right, okay. So it's readily available 24/7?
[00:20:40] David Snead: Right. That's the goal. Right now it's not, but the goal is to kind of figure out a way to make something like that possible.
[00:20:47] Nathan Wrigley: Yeah, okay. I also suppose that the hosting companies, whilst this is good for their business if they can minimise costs and hand a lot of this work over to you, there's a part of them which would also probably like to put some sort of badge on their website to say, this is what we're doing. We're part of this alliance, for want of a better word. Is that something that you are looking to develop as well, you know, some sort of credentialing system to demonstrate that you're in this?
[00:21:12] David Snead: So that's not something that the IIF is working on. It's something that the Secure Hosting Alliance does. The Secure Hosting Alliance has a trust seal that we give to hosts who fulfil our Trust Seal Certification provisions. But that's not something that the IIF does.
Talking about like why, other than business reasons, folks should participate in this, one of the things that is going on that I would suggest that most hosts know about, is there's a little bit of a moral panic going on in the world about what contents you have. And regulation is actually a very real thing for the hosting industry, who has not ever been regulated. This is the time where you can say, hey, this is what we're doing, right? We're dealing with issues. This way a trust seal is the same thing, right? It's something that you can say, we are actually taking steps to make the internet a better place.
[00:22:18] Nathan Wrigley: I think if you are a general agency owner or, I don't know, just a freelancer, hosting is one of those things that you, once you've done it once, you're in it for the long haul until something goes wrong. But you're also browsing around for any tiny indication of why is this host slightly different? You know, what is it that they're doing that, I don't know, is faster? What is it that they're doing that's more secure? So it feels to me if you had a credentialing system and I began to hear about it and see it pop up again and again, it would be one of the metrics which I would weigh up when looking at hosting.
[00:22:51] David Snead: I would think so. One of the things that a trust seal does is it indicates that there's been some vetting of the host. That someone has determined the things that are important to the hosting industry and are important to the web design industry. The agency industry are also important to the host.
Great example of that is one of the provisions of the Secure Hosting Alliances' Trust Seal Certification is that a contract is presented to the customer before they sign up, which is super customer friendly.
One of the things as a lawyer that you hear about all the time when people are dissatisfied with their services is, yeah, well, I never saw that contract. Or it was just a hyperlink in an email that I got. That's one of the differentiators for a Trust Seal certified host is that the contract is actually presented to them, to the customer beforehand.
[00:23:57] Nathan Wrigley: So in terms of the WordPress crowd, is this a thing that you are pitching only to hosts? Like when you step out of here, are you trying to have conversations only with hosts? Or is there some bit of the WordPress community, the freelance, the agency owners? Are you trying to communicate with them just to scope out what they need?
[00:24:15] David Snead: So for both the Secure Hosting Alliance and for the IIF, it is that. I really enjoy talking to agencies and developers about whether this is important to them, or why it might be important to them.
[00:24:31] Nathan Wrigley: In terms of how long this project's been going, I've only heard of it because of your participation here, but I don't know if you've been banging this gong for a decade or, I mean you've been in the industry for long enough to have been banging it for decades. Is this a new initiative or is this something which has a long and storied history?
[00:24:49] David Snead: So the Secure Hosting Alliance has only been active for a year, a little bit over a year. I've been talking about abuse for a long time, but the Secure Hosting Alliance has only been around for a year.
[00:25:01] Nathan Wrigley: And have you, in that year, got any intuitions that you'll be here for another year? Is it basically going in the right direction?
[00:25:09] David Snead: It is going in the right direction. So we started out with two or three charter members. We now have 25 hosting members. We have three security vendors who are members as well. We have, I think, 17 Trust Seal Certified members, and we're launching in 2027 a trust seal for security vendors who provide services to hosting companies.
[00:25:40] Nathan Wrigley: I know that several owners of hosting companies listen to this podcast. They may very well be the people that you've spoken to already, but if they are not, and they are people who would like to investigate this further, I suppose the thing that's going to be in their head is, okay, Nathan and David, you've explained what I'll get out of it, what do I need to put into it? So is this an annual financial commitment? How does it all work from that point of view?
[00:26:02] David Snead: Yeah, so you become a member of the i2Coalition. And so the Secure Hosting Alliance is a working group of the i2Coalition. So you would be a general member and you would participate in the Secure Hosting Alliances' working groups. You also have the ability to participate in the i2Coalition as a whole, which is a much larger trade association that represents almost everyone in the internet infrastructure vertical. Mostly doing policy work, primarily in the US and the EU. Although there's, we're doing some work in India right now as well.
[00:26:40] Nathan Wrigley: And does membership allow you to steer the future of the project? I know that lots of chefs in the kitchen results in terrible food, but that, I fear, is something that could happen. You've got 87 members, 260 members. And then the 260 members all start to bicker and, you know, we want this, no. You see how it goes.
[00:26:59] David Snead: I do.
[00:26:59] Nathan Wrigley: What's the position there? You know, is there sort of gated levels of membership? How are you organising all of that?
[00:27:04] David Snead: There are not. The membership is based on self-reported revenue. The membership is not horrifically expensive from my perspective. And I think that that, most of our members would say that it is, it's actually relatively affordable, particularly for the small to medium sized hosts. And registrars or design agencies, anyone who's participating.
The question about, who's running the show, comes up quite a bit. We haven't really faced that issue, particularly in the Secure Hosting Alliance. Folks seem to get along. But the organisation runs on the idea of rough consensus. And so decisions end up not being controlled by one member or not. Some of the i2Coalition has some very large companies who everybody knows about, who get along with startups, and folks against whom they compete directly. And policies still get made. The organisation still moves forward.
[00:28:11] Nathan Wrigley: Yeah, I guess you're in a space where, obviously all of these hosting companies commercially are vying for everybody else's business. But in this particular situation, that is not the case. Nobody's vying for their websites to be less secure. They all want the same level of security. So at least in that sense, you would hope that consensus could be maintained even if, commercially, the two companies that are in the room, the 10 companies that are in the room might be commercially at loggerheads with each other. At least on this they could agree. That would be the hope, I suppose, anyway.
[00:28:47] David Snead: It seems to be, not only the hope, but the actual way that things work. You ask about how compromise is reached. What comes to mind is I have a much different concept of privacy than, particularly when I was at WebPros, than other folks in the i2Coalition had. And another company just called me up and we worked through our disagreements about how privacy should be handled within the i2Coalition and were able to move forward.
The industry I've found to be hugely collaborative, particularly the hosting industry. Everybody knows what their competitor is doing. But when it comes to addressing an issue like, how are we going to deal with abuse as a community? Folks come together. CEOs of hosting companies while they compete tend to be relatively good friends.
As I said at the very beginning, it really is like the Hotel California, right? You come in as a CEO of a hosting company, you grow it and you sell it to another company. All of a sudden you're at the bottom again with a server in your grandma's basement, you know, trying to start again.
[00:30:08] Nathan Wrigley: It's a really curious effort. I suppose really at the bottom of this entire podcast is your endeavour to be heard and to reach out and get some conversations going. So with that in mind, where do people find the information about this? So maybe there's a website that we could mention. But also, is there a specific place where you hang out? Is there a place where you would like to be contacted most?
[00:30:33] David Snead: Sure. So our website is hostingsecurity.net. I'm not too afraid of getting too much spam. So folks can email me at snead@i2coalition.com And the two is the numeral two. So it's snead@i2coalition.com. And I'm happy to answer questions.
In terms of hanging out, I am at most industry conferences in the hosting industry. In the WordPress industry, I'll be at WordCamp US. We also participate very heavily in ICANN. So there is an i2Coalition member at every single ICANN meeting.
[00:31:12] Nathan Wrigley: So if you go to wptavern.com and you search for the episode with David Snead, S-N-E-A-D, you'll be able to find those details. I'll put everything into the show notes. So anything that I missed? Was there a particular focus that we didn't touch?
[00:31:26] David Snead: No, this is actually one of the most thorough podcasts I've been on recently.
[00:31:31] Nathan Wrigley: That's love to hear it. Well, David Snead, thank you very much for joining me today.
[00:31:35] David Snead: Glad to be here. Thanks for having me.
On the podcast today we have David Snead.
David has been involved in the hosting industry since 1999, starting out as legal counsel for one of the earliest shared hosting companies and going on to work with over 50 others. He helped found the i2Coalition, serve as in-house counsel for cPanel and WebPros, and now leads the Secure Hosting Alliance.
If you're listening to this podcast, I'm sure that many of you will have worked closely with hosting companies. Perhaps you run an agency or business that depends on the reliability, ethics, and security of hosting providers. David is here to talk about cross-industry collaboration in the hosting world, specifically around improving security, professionalism, and communication between hosts.
The conversation focused on why and how the Internet Infrastructure Forum (IIF) is building a framework for real-time intelligence sharing and abuse reporting, aiming to help the entire ecosystem detect and prevent attacks faster than adversaries can adapt.
David talks about the challenges hosting companies face, especially smaller ones, in keeping up with security, and how this evolving project hopes to ease this by sharing actionable, non-proprietary abuse information across registrars, hosting providers, DNS services, and more. He discusses the growth of both the Secure Hosting Alliance and the IIF, the business case for collaboration, and the nuances of legal and technical information sharing across borders.
If you're in hosting, run a web agency, or just want to know how the backbone of the web is working to stay more secure and connected, this episode is for you.
Useful links
Secure Hosting Alliance website
08 Jul 2026 2:00pm GMT
HeroPress: “Listen… the birds are already singing” – “Послухай… пташки заспівали”
![Pull Quote: WordCamp Europe has become one of the few places where [Ukranians] can reassemble in person. WordCamp Europe став одним із небагатьох місць, де [українці] можуть знову зібратися разом наживо.](https://heropress.com/wp-content/uploads/3026/07/volodymyr_banner.webp)
Це есе також доступно українською.
"Listen… the birds are already singing," said Danylo - a Ukrainian I'd met at a previous WordCamp - as we were wrapping up the last hour of the WCEU afterparty in Krakow. "It's time for us to go." He started singing "Hei! Hei! Hei, sokoly! Omynaite hory, lisy, doly." I started singing with him. The Polish guys next to us continued singing in Polish "Dzwoń, dzwoń, dzwoń dzwoneczku, Mój stepowy skowroneczku." Some people behind us joined the choir. That was "Hey Sokoly" - a Ukrainian-Polish folk song - carrying us out of Bastion III, a 19th-century Austrian fortress on the edge of Krakow's Old Town, as the night turned to morning.
But to explain how I ended up there, I need to go back to where it all began.
Mykolaiv
It all started in Mykolaiv, the city of shipbuilders and brides, where I spent my childhood. I graduated from two universities I had been attending simultaneously and started looking for a job during a gap year. I planned to find work to earn some money for further education while preparing for the entrance exams to one of the Finnish universities. Mykolaiv didn't provide good opportunities for graduates unless you had very good connections, but I managed to find a job at an "IT" company. In 2011, the term "IT" didn't mean much to me, but they required English, which was my major, so I thought - why not. The work wasn't particularly difficult: I had to pretend to be "Bob" from the United States, helping customers who had purchased physical products by tracking their orders and walking them through setup instructions. I was fired after a month and a half. Maybe I underperformed, or maybe somebody just didn't like me - either way, it's water under the bridge.
The first job I'd gotten entirely on my own, the first paycheck that proved I could be independent, and the first time being fired - all of it hit me at once. The last part was devastating, made worse by comments like "it was too good to be true," "we told you they'd trick you," and "look at so-and-so, doing such-and-such and earning properly." It was hard to sit with feeling like a failure. But somewhere in that difficulty, I got tougher - and more determined to prove everyone wrong.
TemplateMonster
The first job was a failure, but it gave me one clear answer: I needed to stay in IT. The next job was TemplateMonster.com - well known in certain circles. It was the complete opposite of what I'd experienced before. In 2012 they were selling templates for the most popular CMS platforms of the time: WordPress, Joomla, Drupal, and various e-commerce solutions. The onboarding alone took two months, which tells you something about how seriously they took their people - staff rarely left, and when they did, it was for personal reasons, not because they were pushed out.
My job was to help customers with their templates: installation, editing, customization. Difficult, but genuinely interesting - I liked it. This was the first time I encountered WordPress. I worked six nights a week, and Sundays were the strangest - your day off, but your body had adjusted to night shifts and refused to cooperate. None of that bothered me much. Being able to build sites and make things look exactly right was addictive. I overworked, learned constantly, pestered developers with questions, all just to quench my thirst for knowledge. It ended quickly: I got accepted into three master's programs in Finland, chose one, and left for Central Finland.
Helsinki

Studying in Finland was genuinely different from anything I'd known in Ukraine - in the best possible way. Once the mandatory courses were done, I started looking for work. It was harder than I expected: a year of passive searching, then six months of applying every day. Eventually, I landed at a Helsinki-based agency building WordPress websites - which is still what I do today. A friendly team, around ten people - I'm still close with many of them. We built sites of varying complexity during the day and spent evenings playing board games, swapping stories, and throwing the occasional party.
That's also where I attended my first WordPress event: WordCamp Helsinki 2017, a two-day conference. It didn't blow me away, but it opened something. When you work in a small agency, you live inside your own bubble - and then suddenly a whole other world appears. You see the other side of WordPress: the community, the people pushing it forward, the people wrestling with the same problems you are and finding creative ways through.
That first local WordCamp was enough to make us want to go further. In 2019 the team went to Berlin for WCEU - my first trip abroad outside of the Finland-Ukraine route I knew well. We spent a few days exploring the city and attending the event. WordCamp Europe is a different scale entirely: thousands of attendees, hundreds of volunteers making it happen. Standing in that crowd, I knew I wanted to be part of it - not just as a visitor. And then corona happened.
Porto
WCEU 2020 and 2021 were online, and I felt they were missing the whole point - thousands of people in one place, feeding off each other's energy. So when Porto was announced for 2022, I started packing. This time, I joined as a volunteer, to see WordCamp from the inside. It was the right call. It was also a difficult time for Ukrainians - the full-scale invasion was by then well into its second year, and everyone was finding their own way to cope. For me, this event became a source of strength. I connected with the Ukrainian community, had real conversations with speakers, and came away feeling like I'd experienced what WCEU is actually for.
That trip also clarified something I'd been circling around for a while. I've always loved traveling, but there was a barrier that had nothing to do with visas or money - though those were factors too. It was a justification problem. Coming from a culture where time should be spent purposefully, traveling for its own sake felt hard to defend. A work conference, though? Completely justifiable. Nobody asks how much fun you had. I've been to Germany, Portugal, Italy, Switzerland, and Poland this way. Spain is next.
Attending WordCamps is one thing. Building a similar event is another.
WP Suomi
In 2025 I became the lead organizer of WP Suomi - the first independent Finnish WordPress event, held in Helsinki. The months before October 10th were intensive in ways I hadn't anticipated: budgets, logistics, gifts, merch, catering, venue coordination, a hundred small details that needed to be right simultaneously. I remember waking up at midnight worrying that I hadn't ordered something in time and it wouldn't arrive before the event. Most of the work that goes into an event like this is invisible to the people attending. They see the schedule, the food, the afterparty. They don't see the half a year of pieces being polished before the puzzle comes together.

On the day of the event, there was nothing left to worry about. Whatever needed doing had been done - if something had been missed in the preparation, it would show up now and there would be little we could do about it. So why worry? The time for that was the preparation, not the day itself. The team - experienced, reliable, no hand-holding required - knew exactly what they were there for.
Around 300 people attended WP Suomi. Forty filled out our feedback form afterward, giving an overall score of 4.47 out of 5. But the number mattered less than what people wrote: networking, atmosphere, meeting old friends and new ones, a community that welcomes everyone openly. Reading that, I recognized the same feeling I'd had at WordCamp Helsinki 2017 - something new, interesting, and full of possibility.
Organizing WP Suomi gave me a clearer understanding of what goes into making these events happen. Having been a volunteer at WCEU and then a lead organizer at WP Suomi, I arrived in Krakow with a slightly different perspective - a better sense of what the people around me were going through. This year I'm back on the WP Suomi organizing team as speakers coordinator - a different role, another angle.
Krakow
WordCamps have changed for me over the years - less about the sessions on stage, more about what happens between them. As an organizer, you miss most of the talks anyway, pulled in ten directions at once. But real life happens in the corridors, and at the parties in the evenings.
This matters especially for the Ukrainian community. The war has scattered us across Europe - different countries, different companies, different lives. WordCamp Europe has become one of the few places where we reassemble in person: to share what the year brought, to meet people we only knew online, to see the community still growing despite everything. Many couldn't make it to Krakow, some would not be able to visit these events anymore. For those of us who could, the room carried extra weight.
That's what Danylo and I were singing about at dawn outside Bastion III, even if neither of us said it out loud. I hope to do that someday in the afterparties in Helsinki and Kyiv - whenever that becomes possible again.
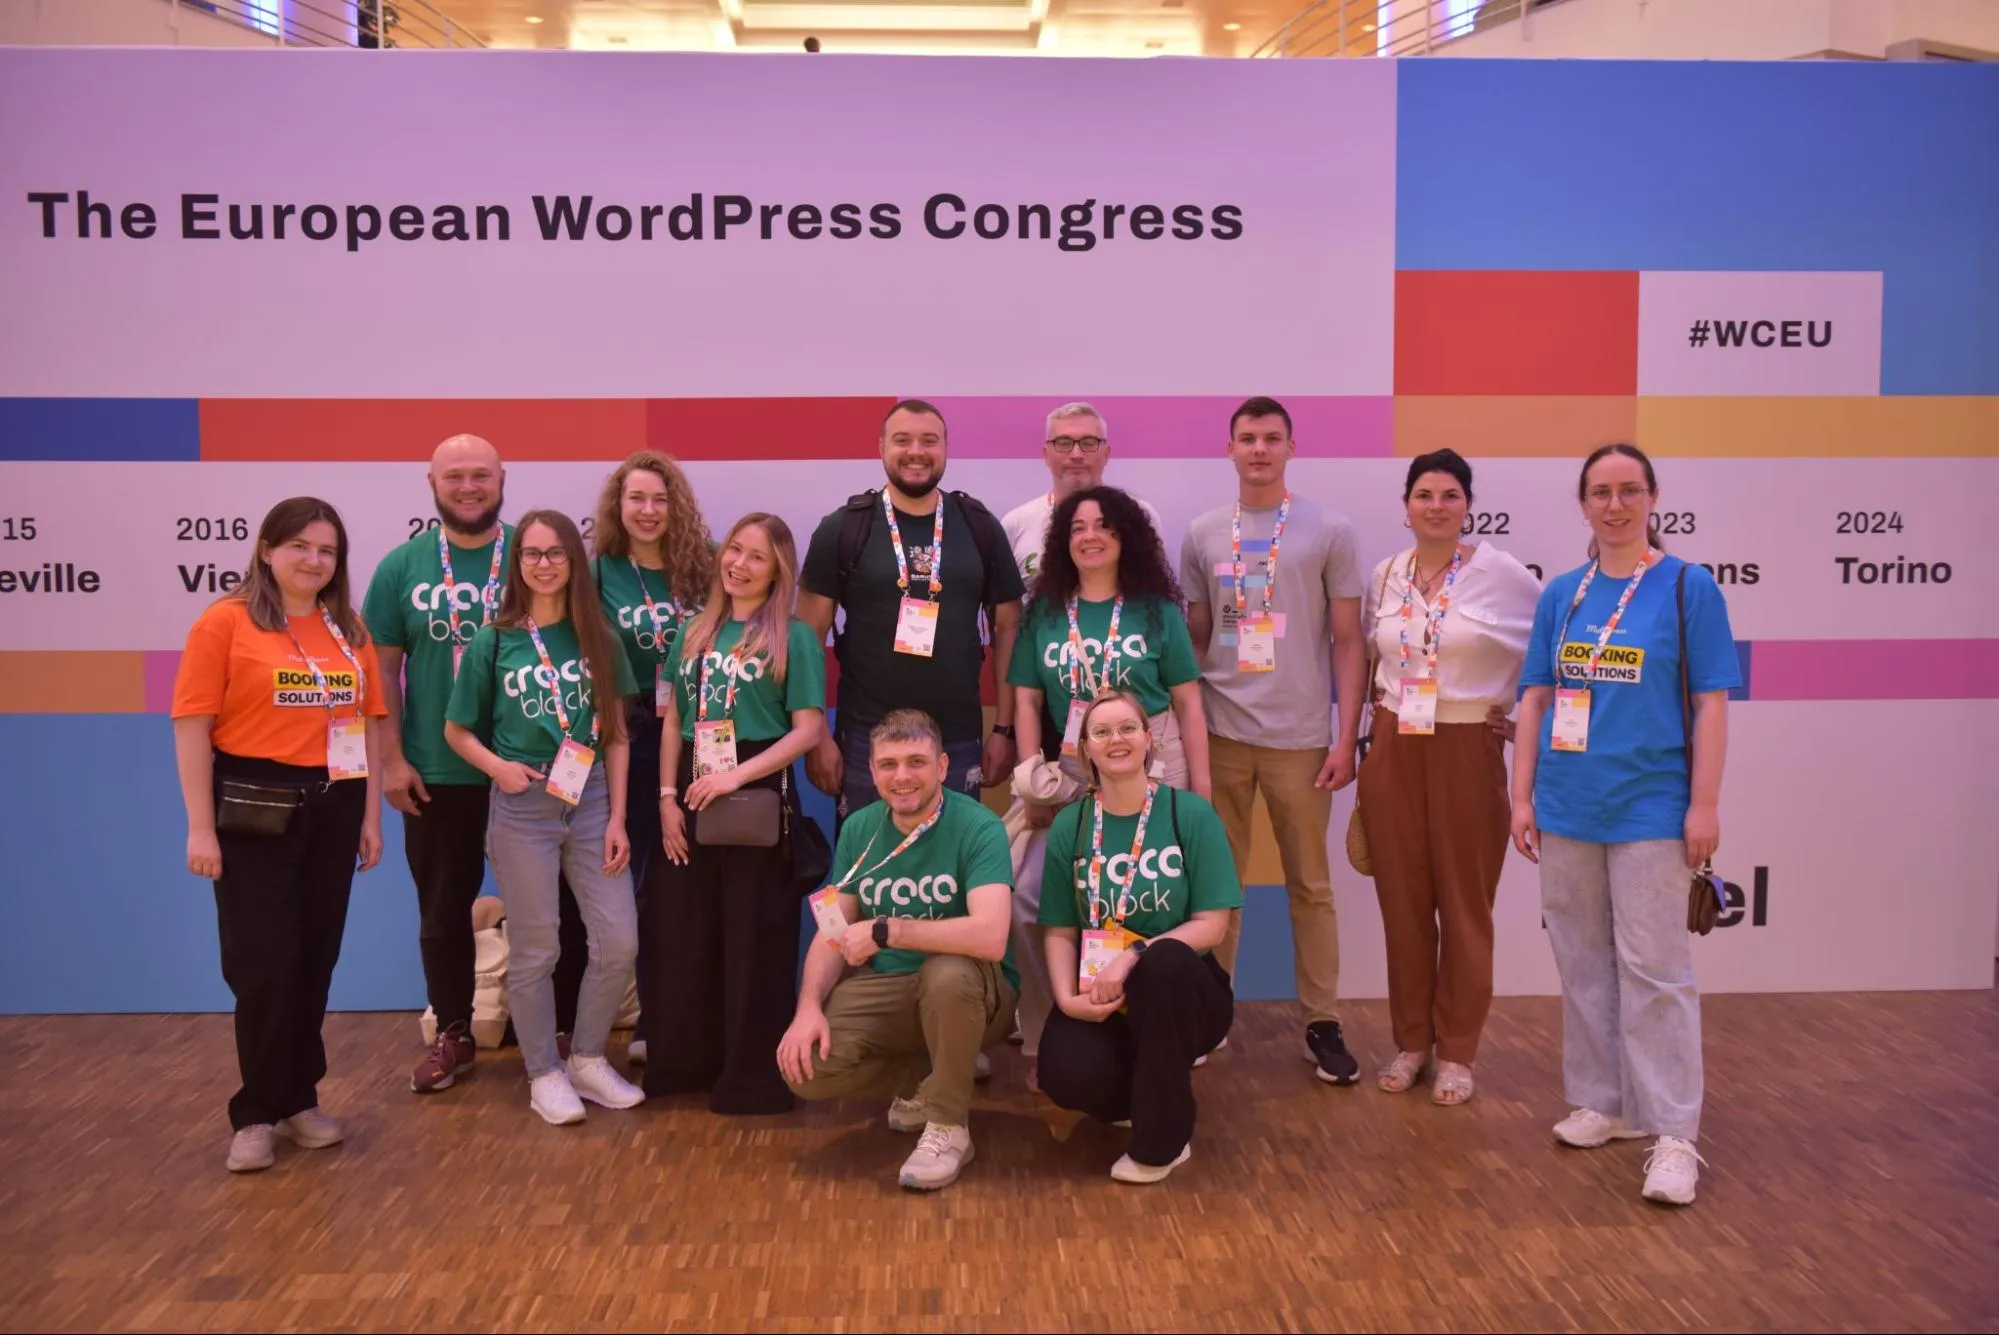
Volodymyr's Work Environment
We asked Volodymyr for a view into his development life and this is what he sent!
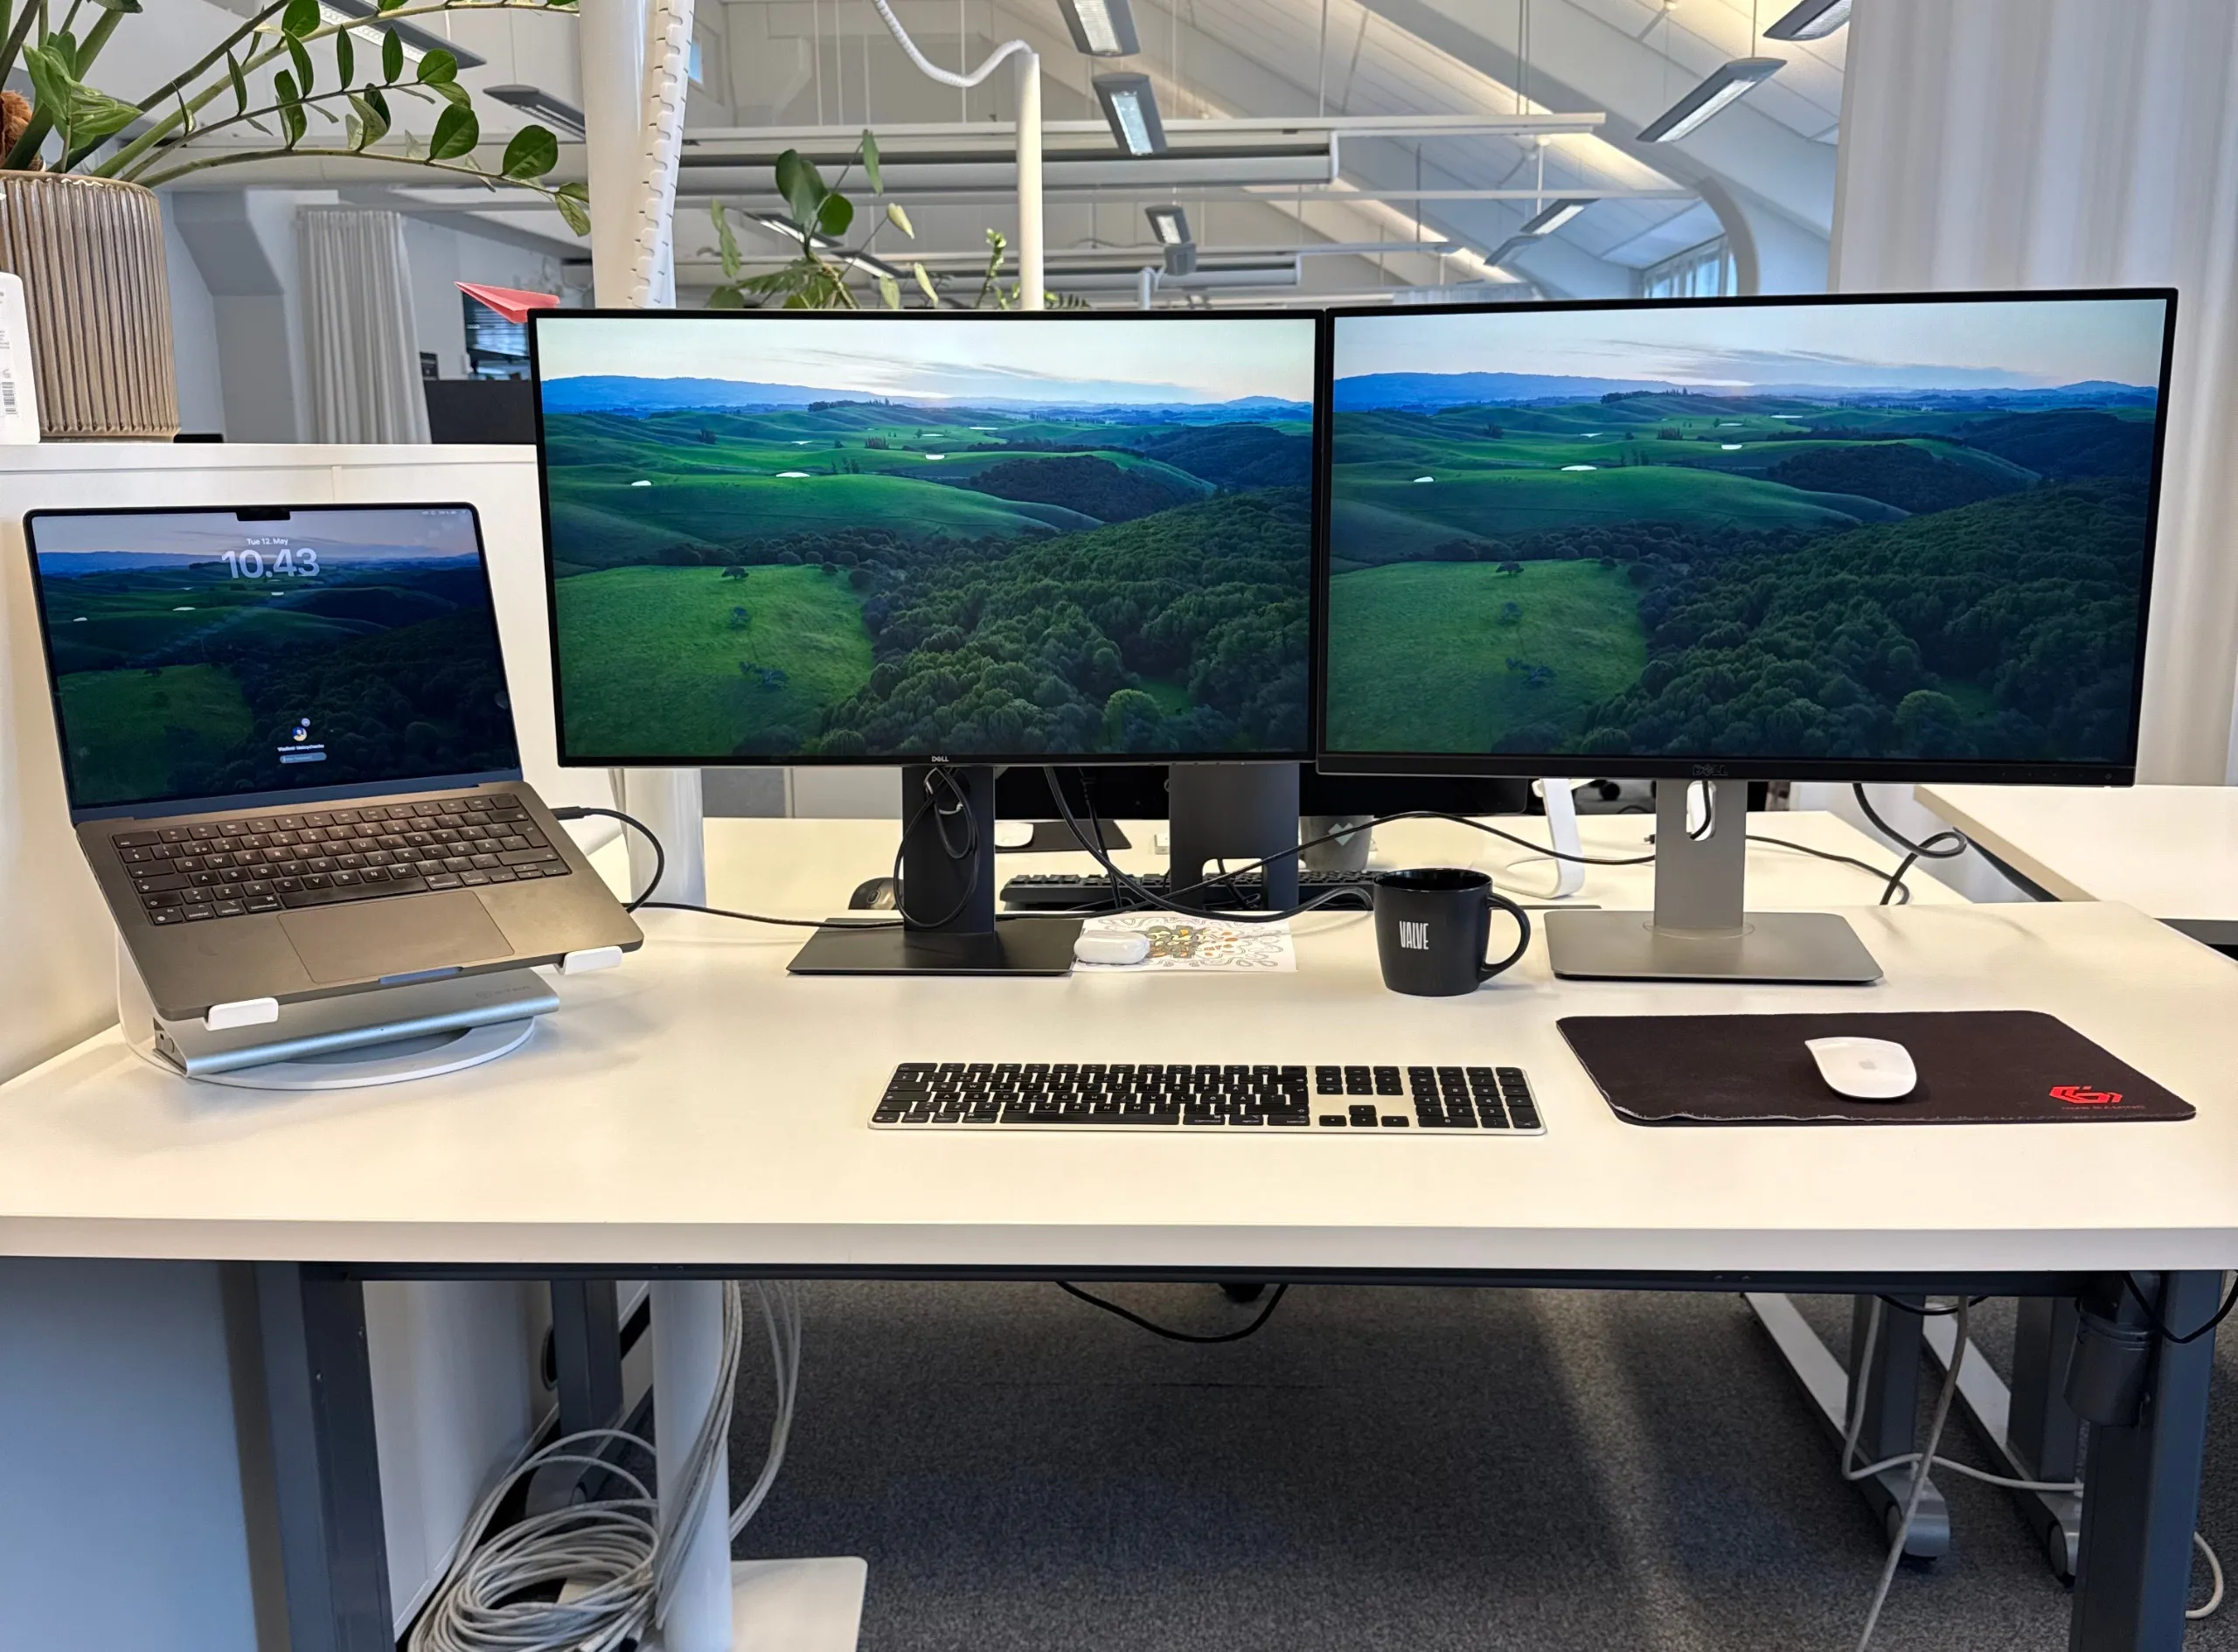
HeroPress would like to thank Draw Attention for their donation of the plugin to make this interactive image!
"Послухай… пташки заспівали"
«Послухай… пташки заспівали», - сказав Данило, українець, з яким я познайомився на попередньому WordCamp - ми якраз протеревенили останню годину afterparty WCEU у Кракові. «Значить нам теж час іти». І тут він від душі почав співати «Гей, гей, гей, соколи, оминайте гори, ліси, доли». Я підхопив пісню разом із ним. Поляки, що ішли поруч продовжили польською: «Dzwoń, dzwoń, dzwoń dzwoneczku, mój stepowy skowroneczku». Хтось позаду теж приєднався до хору. Це була «Гей, соколи» - українсько-польська народна пісня - під акомпанемент якої нас виносив натовп із Бастіону III, австрійської фортеці XIX століття на околиці краківського Старого міста, саме тоді, коли вже ніч переходила у ранок.
Щоб пояснити, як я там опинився, доведеться повернутися до самого початку цієї історії.

Миколаїв
Ця історія бере свій початок у Миколаєві - місті суднобудівельників і наречених, де я виріс. Здобув освіту у двох університетах, де навчався одночасно і почав шукати роботу під час року перерви перед продовженням навчання. Я планував знайти собі роботу, щоб заробити грошенят для продовження навчання, готуючись до вступу в один із фінських університетів. У Миколаєві було важко знайти якісь серйозні перспективи для випускника, хіба що в тебе є зв'язки, але я примудрився знайти роботу в "IT" компанії. У 2011 термін "АйТі" нічого мені не говорив, але там потрібна була англійська, яка була моїм основним предметом в університеті, тому я подумав, а чом би й ні? Робота не була важкою: треба було казати, що я "Боб" із США і допомагати клієнтам, які купували фізичні продукти, відслідковувати їх замовлення і давати інструкції, як використовувати оте, що вони поназамовляли. Мене звільнили через півтора місяці. Можливо, я щось не так робив, можливо, просто не вдався обличчям - у будь-якому випадку, що було, то загуло.
На цю роботу я влаштувався самостійно, без будь-якої підтримки, перша заробітна плата була символом моєї незалежності, і перше звільнення - це був бурхливий вир емоцій. Але остання частина просто вибила землю з-під моїх ніг, гірше тільки зробили коментарі на кшталт: "це було занадто добре, щоб бути правдою", "та ми тобі казали, що там надурять", і "подивись на нього - він робить те та й се, ще й добре заробляє". Дуже важко було бути вдома і відчувати себе невдахою. Але це відчуття зробило набагато більше ніж будь-яка ефемерна підтримка - воно мене загартувало і пробудило палке бажання довести, що всі помилялися щодо мене.
TemplateMonster
Хоч перша робота виявилась провалом, вона дала мені чітке розуміння, що треба продовжувати шукати роботу в IT. Наступну роботу я знайшов у TemplateMonster.com - добре відому у певних колах. Вона була повною протилежністю моєму минулому досвіду. У 2012 році вони продавали шаблони для більшості популярних CMS-ок того часу: WordPress, Joomla, Drupal, і для різних рішень електронної комерції. Лише ознайомлення з роботою і навчання зайняло два місяці, що промовисто свідчить про те, наскільки серйозно компанія сприймала своїх людей - майже ніколи не звільняли, а якщо люди й ішли з роботи, то з власних причин.
Моїм завданням було допомагати клієнтам із шаблонами, які вони придбали: встановлення, налаштування, редагування. Було доволі складно, але дуже цікаво - мені подобалося. Тоді я вперше познайомився із WordPress. Я працював шість ночей на тиждень, а неділі були найважчими, бо тіло звикало до активності вночі і відмовлялося спати. Хоча такий графік мене не дуже турбував. Можливість створювати будь-які сайти і кастомізувати їх саме під себе - оце було до дідька захопливо. Я багато перепрацьовував, вивчав щось нове, заколупував розробників питаннями, щоб хоч трохи вгамувати жагу до знань. Але усе закінчилося несподівано швидко: я отримав три листи про зарахування на магістратуру у Фінляндії, вибрав один університет і поїхав до Центральної Фінляндії.
Гельсінкі
Система навчання у Фінляндії побудована зовсім по-іншому - і, на мою думку, на краще. Коли я закінчив основні курси моєї спеціальності, я почав шукати роботу. Завдання було не з легких: рік я шукав пасивно, де-не-де подаючи заявки на роботу, і ще пів року я зайнявся цим активно, відгукуючись на декілька вакансій щодня. Зрештою, доля занесла мене у Гельсінське агентство, що розробляло сайти на WordPress - цим я займаюся і сьогодні. У нас була дуже дружня команда, приблизно з десяти людей, з більшістю з них я досі дружу. Ми будували сайти дуже різного рівня складності, удень, вечорами грали в настолки, ділились історіями зі свого життя і влаштовували грандіозні вечірки.
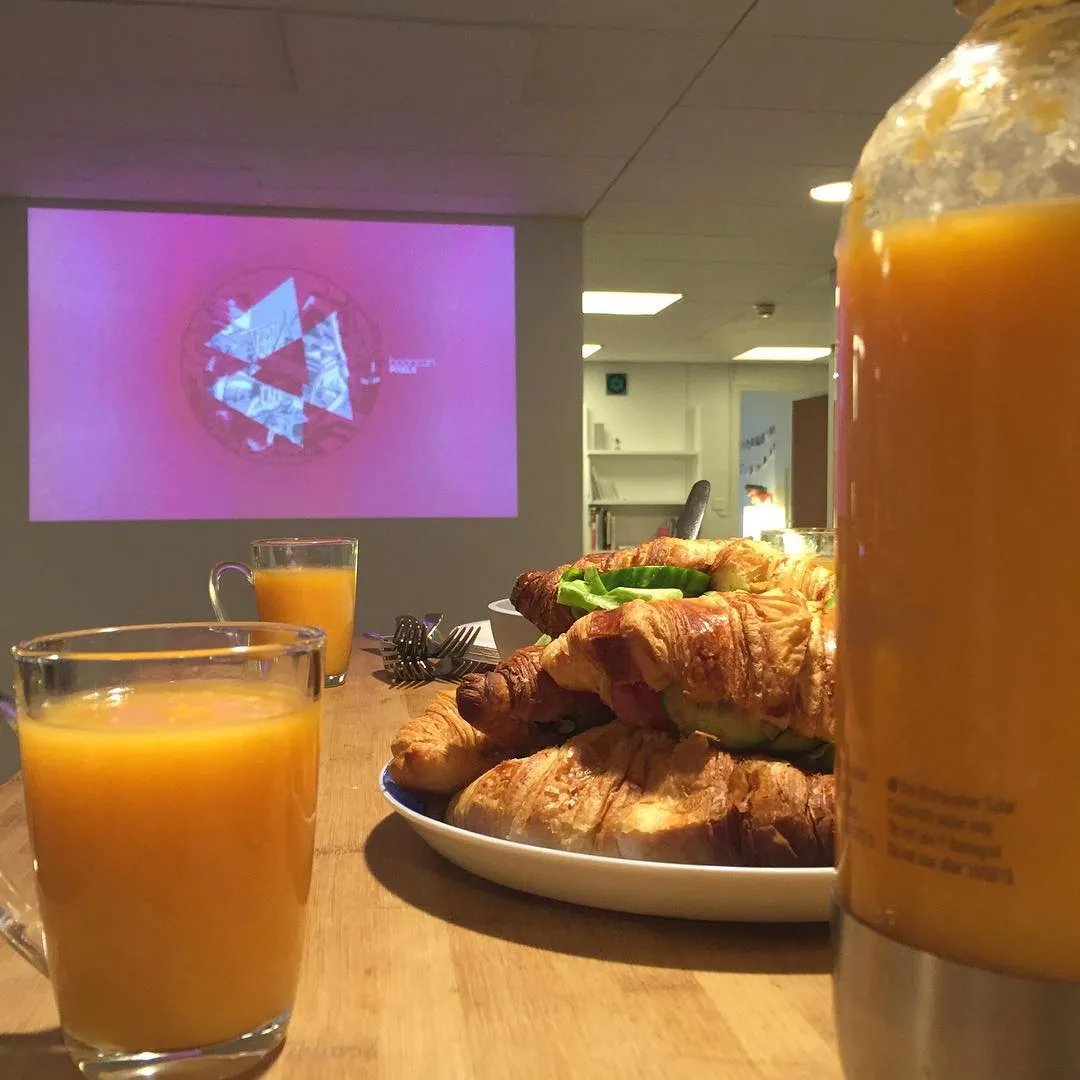
З цією командою я вперше відвідав подію WordPress: WordCamp Helsinki 2017 - дводенну конференцію. Я не був вражений наповал, але вона відкрила мої очі на дещо. Коли ти працюєш у маленькому агентстві, і живеш у своїй бульбашці, а тут неочікувано відкривається цілий всесвіт. Ти бачиш іншу сторону WordPress - спільноту, людей, які рухають увесь проект вперед, людей, які стикаються з тими самими проблемами, які знаходять творчі способи ці проблеми вирішити.
Того першого місцевого WordCamp'у було достатньо, щоб нам захотілося рухатися далі. У 2019 році наша команда поїхала до Берліна на WordCamp Europe - це була моя перша закордонна поїздка за межі звичного для мене маршруту між Фінляндією та Україною. Ми провели кілька днів, досліджуючи місто й відвідуючи конференцію. Масштаб відчувався зовсім по-іншому: тисячі учасників і сотні волонтерів, які усе організовують. Стоячи серед цього натовпу, я зрозумів, що хочу бути частиною цього, і не просто як відвідувач.
А потім почалася пандемія коронавірусу.
Порто

WordCamp Europe 2020 і 2021 років проходили онлайн, і мені здавалося, що вони втратили найголовніше - тисячі людей, зібраних в одному місці, які заряджають одне одного своєю енергією. Тож коли оголосили, що WCEU 2022 відбудеться в Порту, я почав збирати валізу. Цього разу я приєднався до команди волонтерів, щоб побачити WordCamp зсередини. І це було правильне рішення. Для українців це був непростий час - повномасштабне вторгнення вже тривало, і кожен шукав свій спосіб впоратися з новою реальністю. Для мене цей захід став джерелом сили. Я ближче познайомився з українською спільнотою, жваво дискутував зі спікерами й повернувся з відчуттям, що нарешті зрозумів, нашо той WordCamp.
Та поїздка також допомогла мені усвідомити дещо, над чим я давно розмірковував. Я завжди любив подорожувати, але існував бар'єр, який не мав стосунку ні до віз, ні до грошей - хоча й вони теж відігравали свою роль. Проблема була в тому, як виправдати саму подорож. Я виріс у культурі, де час потрібно витрачати з користю, тому подорожувати просто заради подорожі здавалося чимось, що важко пояснити. А ось робоча конференція - зовсім інша справа. Це цілком виправдана причина. Ніхто не питає, скільки задоволення ти на ній отримав. Саме так я побував у Німеччині, Португалії, Італії, Швейцарії та Польщі. Наступна - Іспанія.
Відвідувати WordCamp - це одне. Створювати подібний захід - зовсім інше.
WP Suomi
У 2025 році я став головним організатором WP Suomi - першого незалежного фінського заходу, присвяченого WordPress, що відбувся в Гельсінкі. Місяці, які передували 10 жовтня, виявилися набагато напруженішими, ніж я очікував. Бюджет, логістика, подарунки, мерч, кейтеринг, координація локації - і сотні дрібниць, які мали зійтися в потрібний момент. Пам'ятаю, як прокидався посеред ночі з думкою, що не встиг замовити щось вчасно і воно не приїде до початку події. Більшість роботи, яка стоїть за такими заходами, залишається непомітною для учасників. Вони бачать програму, їжу, афтепаті. Але не бачать тих пів року, протягом яких окремі деталі поступово складаються в єдину картину.
WP Suomi відвідали близько 300 людей. Після заходу сорок учасників заповнили форму зворотного зв'язку, оцінивши його в середньому на 4,47 із 5. Але для мене важливішою була не сама оцінка, а те, що люди писали: нетворкінг, атмосфера, зустрічі зі старими друзями й нові знайомства, спільнота, яка відкрито приймає кожного. Читаючи ці відгуки, я згадав себе і те саме відчуття, яке пережив на WordCamp Helsinki 2017, - це щось нове, захопливе й сповнене можливостей.
Організація WP Suomi допомогла мені значно краще зрозуміти, що стоїть за проведенням таких заходів. Після досвіду волонтера на WCEU, а згодом і головного організатора WP Suomi, я приїхав до Кракова вже з іншим поглядом - набагато краще розуміючи, через що проходять люди, які працюють поруч. Цього року я знову в команді організаторів WP Suomi, але вже в ролі координатора спікерів. Інша відповідальність, інший погляд.

Краків
За ці роки WordCamp для мене змінився. Тепер він менше про доповіді на сцені й більше про те, що відбувається між ними. Як організатор, ти все одно пропускаєш більшість виступів, адже тебе одночасно тягнуть у десять різних боків. Але справжнє життя вирує в коридорах і на вечірках після завершення основних сесій.
Особливо важливо це для української спільноти. Війна розкидала нас по всій Європі - різні країни, різні компанії, різні життя. WordCamp Europe став одним із небагатьох місць, де ми можемо знову зустрітися наживо: поділитися тим, що приніс цей рік, побачитися з людьми, яких досі знали лише онлайн, і переконатися, що наша спільнота продовжує зростати попри все. Багато хто не зміг приїхати до Кракова, на жаль дехто вже ніколи не зможе побувати на цих заходах. Для тих із нас, кому це вдалося, ці зустрічі мають особливе значення.
Саме про це ми з Данилом співали на світанку біля Bastion III, хоча ніхто з нас не сказав цього вголос. Сподіваюся, колись мені ще доведеться робити це на афтепаті в Гельсінкі та Києві - щойно це знову стане можливим.

The post "Listen… the birds are already singing" - "Послухай… пташки заспівали" appeared first on HeroPress.
08 Jul 2026 5:00am GMT
07 Jul 2026
WordPress Planet
BuddyPress: BuddyPress 14.5, 12.7, 11.6
BuddyPress 14.5.0, 12.7.0, and 11.6.0 are now available.
These are security and maintenance releases that include two security fixes, along with a number of compatibility improvements, bug fixes, and code modernization updates. We strongly recommend updating your sites as soon as possible.
Highlights
- Two security issues:
- Prevent user ID spoofing in the Messages REST API endpoint via improved validation.
- Restrict Component management to Users with the appropriate Capabilities.
- Improves compatibility with WordPress 6.9, including support for block style loading optimizations and replacement of deprecated WordPress APIs where appropriate.
- Includes numerous bug fixes across BuddyPress, including BP Nouveau, Groups, Friends, Activity, Administration, and several PHP 8.x compatibility improvements.
Download
You can update automatically from your WordPress Dashboard, or download BuddyPress 14.5.0 directly:
For the complete list of changes included in this release, see the changelog:
Many thanks to our 14.5.0 contributors
Thanks to everyone who contributed patches, testing, reviews, bug reports, and responsible security disclosures that helped make this release possible.
Contributors include: emaralive, vapvarun, westonruter, joelkarunungan, nikunj8866, shawfactor, r-a-y, t.schwarz, dcavins, noruzzaman, rollybueno, potcus, pratiklondhe, yatesa01, bhargavbhandari90, amitraj2203, GaryJ., espellcaste, needle, and johnjamesjacoby.
Security issues were responsibly disclosed via the WordPress Bounty Program over at HackerOne and through the WordPress Plugins Team. If you were not properly attributed for your contribution here, leave a comment and we'll get you added.
07 Jul 2026 5:57pm GMT
Open Channels FM: BackTalk on DevRel, APIs, Digital Freedom
Insights into the DevRel role's importance, explore endless API possibilities, and consider the balance of digital freedom, cost, and usability in today's tech landscape.
07 Jul 2026 1:04pm GMT
05 Jul 2026
WordPress Planet
Matt: USA 250
This auspicious 250th Independence Day, I find myself thinking of what Om wrote in iAMerican when he became a US citizen in 2013.
On a globe, America is a landmass, a country. In an immigrant's heart it is a belief that future is almost always better. It may not be perfect and it is certainly not equal, but it still is one of a kind - the only place where an absolute stranger with a funny name and a funny accent with no friends or contacts can show up, work hard and actually get to do what he was destined to do. […]
In most places in the world, outsiders like me don't have that chance. That simple truth is what makes America so special. A chance - to be somebody even if you are nobody. America is a state of mind and I have opted-in!
I feel lucky to have been born here, and if I hadn't been, I think I would have gotten here as fast as I could. I'm grateful to the public schools that educated me, the teachers who pushed me, the internet that freed my mind, and the culture of risk and innovation in technology that invested a million dollars in a 21-year-old dropout kid trying to build a company around (but not replacing) an Open Source project.
It's not unimaginable that these things could have happened someplace else, but it would have been a long shot.
On the lighter side, SNL's Washington's Dream skit is one of their best ever, Google has a pretty funny commercial reimagining the Declaration being written, and another famous Matthew (McConaughey) gives a great 2-minute speech. "We need skeptics. Yes, we do. We do not need cynics. One cares enough to question, which we should, and the other one's already quit."
05 Jul 2026 6:59am GMT
02 Jul 2026
WordPress Planet
Open Channels FM: Open Source as Foundation, Not Final Answer
In ecommerce, it's not just about the tech but how it helps merchants grow. Open source can offer control and adaptability, especially with platforms like Woo and WordPress.
02 Jul 2026 9:59am GMT
01 Jul 2026
WordPress Planet
WPTavern: #223 – Ivana Ćirković on How WordPress Credits Bridges Education and Industry in the WordPress Ecosystem
[00:00:19] Nathan Wrigley: Welcome to the Jukebox Podcast from WP Tavern. My name is Nathan Wrigley.
Jukebox is a podcast which is dedicated to all things WordPress, the people, the events, the plugins, the blocks, the themes, and in this case how WordPress Credits bridges education and industry in the WordPress ecosystem.
If you'd like to subscribe to the podcast, you can do that by searching for WP Tavern in your podcast player of choice, or by going to wptavern.com/feed/podcast, and you can copy that URL into most podcast players.
If you have a topic that you'd like us to feature on the podcast, I'm keen to hear from you and hopefully get you, or your idea, featured on the show. Head to wptavern.com/contact/jukebox and use the form there.
So on the podcast today we have Ivana Ćirković. Ivana is a digital marketer with 18 years of experience working both in and out of the tech industry, and currently leads marketing at WPBakery. She's an active participant in WordPress events, having attended, and spoken at, numerous local and international word camps over the years.
In this episode, our focus is on the WordPress Credits initiative. We learn how this program, launched by the WordPress Foundation, connects students with real world opportunities to contribute to the WordPress ecosystem, earn certifications, and increase their competitiveness in the job market.
Ivana discusses her own experience as a WP Credits mentor, working with students as they learn about digital marketing, remote work, and other open source contributions. We explore, how universities can modernise their curriculums, and real world value for students by participating in the initiative, and how businesses can get involved, not just to support the community, but to help shape and discover future talent.
The program's evolving structure also gets attention, and we learn how students are guided through hands-on activities such as translation or documentation, and how their progress is tracked publicly via profiles on wordpress.org. Ivana shares the opportunities and challenges for both educators and businesses with thoughts on accountability, mentorship, and the need to bring new faces into the WordPress community.
If you're interested in the future of WordPress, education, or bridging the gap between academia and industry, this episode is for you.
If you'd like to find out more, you can find all of the links in the show notes by heading to wptavern.com/podcast, where you'll find all the other episodes as well.
And so without further delay, I bring you Ivana Ćirković.
I am joined on the podcast by Ivana Ćirković. Did I get that right?
[00:03:14] Ivana Ćirković: Yes. Excellent.
[00:03:16] Nathan Wrigley: Thank you. This is my first interview at WordCamp Europe 2026. I'm guessing because we're on the first day of the event and it's quite early in the morning, it's 10 in the morning, I'm guessing you cannot have done your presentation yet?
[00:03:30] Ivana Ćirković: Not yet. Tomorrow.
[00:03:32] Nathan Wrigley: Do you get nervous with these kind of things?
[00:03:34] Ivana Ćirković: I get nervous all the time. I've been doing this for 12 years, it never gets easier. It is what it is.
[00:03:39] Nathan Wrigley: Well, the presentation that you are doing is going to be the focus of what we're talking about today. So do you just want to tell us a little bit about the topic that you're talking about, but also just give us a bit of a general bio about who you are and what you do. So just tell us about you and about your presentation basically.
[00:03:56] Ivana Ćirković: Okay. First thing first, I would like to introduce my presentation, or the talk, that is build up around WordPress Credits initiative, which is something that WordPress has rolled out late last year in December. And I applied to be a mentor to support students into their entering into WordPress. Got accepted, did my courses, passed them and started working with students on their, first entering the WordPress society, how everything works, contributing.
And out of all of this, I came up with the idea of sharing the story about WordPress Credits. What it is, why it is important, not just for the WordPress community, but also for universities all around the world for businesses to support, because there is an angle and huge opportunity for them too. And hopefully inspire people to join and become part of it more.
As far as I'm concerned, my name is Ivana Ćirković and I am a digital marketer for 18 years. I've been working inside tech organisations, tech industry, but also outside of it. So I'm the multiverse. And lately, for past couple of years, I've been working in WPBakery, in marketing their product, and talking to people, sharing knowledge of what we do, how we do it, and so on. In the meantime I am attending many, many WordCamps, local and international ones, giving lectures, giving talks about digital marketing and all things related.
[00:05:39] Nathan Wrigley: So are you here at this event, not just to give your presentation, are you also here on behalf of WPBakery to represent them and the products that they have as well?
[00:05:47] Ivana Ćirković: Yes, we are sponsors. I am speaker, I was table lead for marketing on Contributors Day. So we are wide into the ecosystem.
[00:05:56] Nathan Wrigley: I have to say, having only been in this event space for about an hour, I'm actually deeply impressed by this particular event. It really is a gigantic venue. It's so pleasurable as well to see the WordPress community in such large numbers here. And so we're looking forward to a really good event.
Okay, let's kick off with the topic at hand then. So it occurs to me that many people listening, whilst they're using WordPress and they're kind of, I don't know, they're building websites for people, and they've got products and plugins and they're just general users. It may be that the community piece, and the educational piece, is nothing that they've heard of before. So would you just tell us a little bit about what WP Credits is as far as you're concerned, just to give us that broad background of what it is?
[00:06:40] Ivana Ćirković: Okay. So WP Credits program is initially made to bring new young people into the WordPress, to broaden the ecosystem with the new fresh blood, new contributors. And to do so, WordPress Foundation initiated this program to connect with universities all across the world. To connect students to some programs, to learn about WordPress through contribution. For that, they will get graded and get certification, which in the end will help them be more marketable, and have more modern knowledge of what is needed in today's job market, and to be more competitive and more appealing to potential employers.
So by doing so, WordPress Credits aims to broaden the ecosystem, to strengthen the WordPress community, and WordPress itself. But also to put new generations in more marketable place, and to help them get more profitable jobs.
[00:07:45] Nathan Wrigley: Thank you. That was a really nice summary. In terms of your personal commitment to it and what have you, how did you fall into it as a thing that you were doing? And is this something that you get sponsored for from WPBakery, or is it personal and simply a sort of philanthropic thing that you are doing on the side?
[00:08:01] Ivana Ćirković: Yeah, so basically, I've been doing education my whole professional life. So it's something that comes natural to me. In my local country, in Serbia, I do informal education for high schoolers and primary school's children about digital marketing, digital literacy. This is like very natural to me. I'm being sponsored by WPBakery to do so.
And the program works like, initiative needs people, needs more mentors to get involved. More than it needs like product and businesses to support with their products. So if there are businesses who are maybe interested in support through their product, know that you need to put your people first to actually get involved and contribute, and then you can offer products as the side piece, so to say.
[00:08:52] Nathan Wrigley: So yeah, it seems that you've got a lifelong interest in education as well. Okay, that gives me some sort of hook there.
Okay, if I was to say WP Credits to the people outside, the people who already knew about it, I think would probably peg it as entirely educational in nature, just an education initiative. But curiously, your presentation, the notes that went with that and the blurb that went on the WordCamp Europe website, you kind of make the point that it's much bigger than that, and you get into businesses and the students themselves and universities.
So the students in universities bit, well, that's the education piece. But the business bit, what's going on there? Because I definitely hadn't drawn that intuition. I thought education from top to bottom. But business, okay, where does that fit in?
[00:09:37] Ivana Ćirković: I will get the hot insights from the talk. So basically, there is more than what meets the eye, so to speak. Businesses have unique opportunity to shape people they want to employ by getting involved as mentors. They also get the chance to see firsthand how those young minds work in real environments, in real contribution. And they get the chance to pick and choose who they want to employ by seeing them work on some real things. Whether it's documentation, whether it's translation or programming, developing something, AI.
We need more people who know what they do, although they are young. By having students in this program, they are working on not fictional things, but actual things that really contribute to community and businesses as a whole. By supporting this initiative, businesses then in relations to that can get more insights into who they want to employ. So on top of that, they are building the better market for themselves as well.
[00:10:42] Nathan Wrigley: I guess the student university piece is fairly obvious. You know, WP Credits and the people working on that project communicate with universities, they're probably easy to find. You know, if you go to a phone directory for example, they'll all be there. And it's an easy thing to do. You phone up the university and see if there's interest. And I know that some universities have taken up the WP Credits program. And it seems to be, as far as I can work out, it seems to be working very successfully.
How are you going to make the connection with businesses? Because that seems like a much more scattered, I don't know if you're going to be working with big businesses, you know, huge companies or if it's going to be kind of more the businesses on the street, the smaller businesses, that kind of thing. So, I'll just sort of hand it over at that point.
[00:11:23] Ivana Ćirković: So basically, web agencies, businesses around WordPress, we know they have an issue with new employees onboarding last, let's say three to six months. That cost time and money and other people who are teaching them what needs to be done and how.
Then we have WordPress Credit students who are already doing that junior type of work within contribution. They're already onboarded through using Slack, knowing how to do remote work, what needs to be done. So businesses supporting WordPress Credits initiative can choose those students and spend less time and money and energy in onboarding them because they already went through that by doing WordPress Credits program.
[00:12:10] Nathan Wrigley: Yeah, I guess if you are a small web agency, it's highly likely that you won't necessarily have an induction program finely tuned, so that the young people that are coming through have this sort of specialised system where they can get some accreditation. It's probably more, okay, I'm going to assign you to John this week and then next week you're going to go over to Susan and follow what they're doing.
So is there a sort of structured program that, let's say a web agency based in London could drop into and receive documentation about? Where are we at with that whole process for the busineses?
[00:12:44] Ivana Ćirković: Yeah, so since this initiative is still fairly new and we already have just one generation of students that are passed the program, this is something in development. So at the moment, we still don't have like a specific structure that is based just for agencies and businesses in general, but it is something that we are considering and working towards too. So definitely.
On the other hand, the upper management organisational team might not be aware to the fullest what am I about to talk. So it might come as a surprise to them, but also it is something in the works as well. So give us some time and we will come up with something.
[00:13:26] Nathan Wrigley: Yeah, it feels like that would be something really credible. Because if you're a small business owner, the last thing you want to be doing is kind of wasting time. And onboarding somebody might be something that you'd have to divert weeks into, you know, syphoning employees off, writing documentation, SOPs, those kind of things. And if you could just pick something up off the shelf that was tried and tested over many years, that would actually be really handy. So good luck. I hope that that initiative comes off.
In terms of students, if you were a student, let's say you are at a university, or you are looking for work, what would you say would be some of the top line items that you would mention as to why WP Credits is worth looking at? Because, you know, if I'm at a university, there's probably a thousand different things that I could be doing. WP Credits would be in competition with all of those. Why do you think it's something that young people should be taking care of to look at?
[00:14:17] Ivana Ćirković: Yeah, I would think differently, in that sense. Universities curriculums are outdated comparing to the industry that we are living and working in. So WordPress Credits gives something that is in trend. That is happening now that people are using and working now. So students who choose to go to this program are gaining the most efficient and not outdated curriculum, and things that are being worked on in this moment.
And this is bigger than WordPress. It is initially for WordPress, but the knowledge students get, nobody can take that away. They learn to be outspoken. They learn to use all the necessary remote work tools that is applicable in all the industry.
So we are really encouraging them to be very marketable employees and people who have portfolios, whether they choose that category that brings them portfolio. That is very transparent throughout whatever they do. Because on wordpress.org, every contribution is noted. So they're building their own business brand by doing WordPress Credits. And in that way they are more marketable and can get more business opportunities.
[00:15:42] Nathan Wrigley: I didn't realise that the wordpress.org profile, is it the profile that you mean?
[00:15:47] Ivana Ćirković: Yes.
[00:15:47] Nathan Wrigley: Each time you participate in one of these credit programs, that will be a badge, for want of a better word, that you can display and it will be freely available for the public. And presumably that will be difficult to acquire. That's the wrong word. What I mean is, it won't be simple to acquire. You will genuinely have had to.
[00:16:07] Ivana Ćirković: Yes, you need to do the work. Let's say students are interested in translation. So they go to Polyglots team and they get assigned to a mentor who is on weekly basis working with them on onboarding, helping them how to navigate through wordpress.org website, translation, what needs to be done. And basically, for that student, they need to translate to have approved translation, 150 strings approved.
So that doesn't mean, okay, I will translate 150 words. No, no. You might need to translate 500 words out of which 150 is approved. And this is the bare minimum you need to do in order to get that badge that you contributed. Because that contribution, each contribution needs to be something very specific and tailored to help other people. That is very open and helpful.
[00:17:00] Nathan Wrigley: So you mentioned translations there, which obviously is just one of multiple things that you could do, and we could list them all out, but we won't. How is that curriculum, I'm doing air quotes, how is that curriculum decided upon? In other words, how do you decide, okay, I'm going to do a bit of translation, I'm going to do a bit of work on Core, I'm going to work for the Plugin Review Team? How is that decided? And, how is it decided by the institution, I guess that that's going to equal something which our university will stamp as part of your degree, let's say?
[00:17:33] Ivana Ćirković: Yeah. So basically, that is all arranged between the foundation and universities. You won't get IT students doing marketing if that's not their preferable choice. So students opt in. They're given the whole like curriculum, categories of things they can contribute to. And the one they choose, this is the one they stick to throughout all the programs.
So you cannot switch in between like translation and documentation, or plugins, or WP-CLI whatever. The whole program stick to one chosen category. And that is all aligned with the, let's say, topic of university. So IT is preferable for IT related contributions. Communications are also more favourable towards translation community, marketing. So it's aligned that way.
[00:18:23] Nathan Wrigley: So flipping that round, so we've been talking about it from the point of view of the students. Now let's just flip it around to the point of view of the university. I guess the same thing applies. They would have to communicate with the Foundation and say, okay, these are the kind of things that we wish our students to do. These particular strands, we will, you know, if they do 500 translation strings, that will count as something. I guess there's got to be some interface between the Foundation and each university to establish what a credit equals.
[00:18:50] Ivana Ćirković: Yeah, common ground as to how WordPress Credits adds to the official curriculum of the university. And the thing that university get out of it, they are in position to offer modern, in trend, teachings, and that makes them more appealing to next generation of students. Because the more their existing students who are in the WordPress Credits program are succeeding, the more desirable the university gets to newer generations because they don't teach outdated curriculums. They're aligning to what is now efficient and needed in the job market.
[00:19:30] Nathan Wrigley: I suppose also as well, when I was at university, there was a choice of about, I don't know, four things to do each year. Something like that. You could do this or this or this. And you had to pick one of them and that was your pathway. This feels much more wide open because knowing the WordPress ecosystem, I know that there's dozens, maybe multiple dozens of different things that you could be involved in.
So that's quite appealing as well, isn't it? You know, you can just take a little nibble of this one thing, and another nibble of this. And so there's potentially multiple dozens of different pathways that you could pick. And whilst you say that, once you've decided you've got to stick to that, well, that's fair enough, but the fact that you've got so many different ways that you could choose. That to me as a university student would've been really appealing. The fact that there's so many different things that you could do.
[00:20:15] Ivana Ćirković: Yeah. And once they got in, the overall input that we get from students that, first they don't know that something like this exists. And once they go deep and start work, it's like, wow. The whole mind just shifts, and they are amazed by all the possibilities that they can do within WordPress that isn't talked about.
[00:20:36] Nathan Wrigley: Yeah. And I presume they get to do it in the way that the WordPress community works, which is remotely distributed and when you wish to do it. So long as I, you make the end of the university period of whatever a semester is or something, so long as you make the deadline, you can do it at night or in the early morning or.
[00:20:57] Ivana Ćirković: Exactly. So they are training to be like workers as we all are today, that are not restrained with some deadlines or by official university rules. They're accountable for the final output. How will they come to that output? It's entirely up to them because, yes, they are young but they're not so young that they cannot be held accountable for their actions. So they need to do the work. We got weekly mentorships and assessments. So it's a fun ride.
[00:21:31] Nathan Wrigley: So just touching on that, the sort of ongoing support that every student needs, because with the best rule in the world, there's a proportion of students who will leave everything to the last minute. I'm looking at myself in the mirror when I say that. So that ongoing support, it's a weekly sort of huddle. And is that like a one-to-one thing or is it a one to many thing?
[00:21:50] Ivana Ćirković: Yeah, so depending on the number of students, if a mentor has a one or two students, it can be one-to-one. If there are more like five or six, it's better to have a group meeting on a weekly basis, and then Slack chats in between if anything is more needed than that.
So basically we go through what they did last week, are there any setbacks or they need additional help, or do they need information from other parts of the team? Are they interested in something else? So we are really trying to get them involved in a way that matters to them.
One of the things that each student needs to do, no matter section they chose, is to create a blog and to have weekly blog posts. So we discuss about that. What interests them. Whether they want to be something personal like, or professional like. So it's very interesting to see how they think and how they express themself and how they build their online persona.
[00:22:55] Nathan Wrigley: Do those huddles take place on a, let's say university by university basis? So for example, when you join and you mentor students, are they from the entire WP Campus project, or are you doing it from the university of this town and the university of that town?
[00:23:13] Ivana Ćirković: No, it's mixed and matched.
[00:23:14] Nathan Wrigley: So, okay, well that's a real strength as well it feels, because presumably then you're on a call with people potentially from all over the world. Certainly people that you may not have encountered before. And those sort of serendipitous chance encounters can sometimes be some of the more meaningful ones. You know, work comes out of those things, and meetups come out of those things, and unexpected things come out of those things. So that must be really nice as well, watching those kind of things happen.
[00:23:42] Ivana Ćirković: Yeah, it's like nothing I experienced before. And just to have the privilege to talk and work with those people, you never know what can come up out of them, and out of our connections. And I get inspired every time we have chats and they make me want to be a better educator.
[00:24:03] Nathan Wrigley: Oh, that's interesting.
[00:24:04] Ivana Ćirković: So, yeah, that's my take out of all this.
[00:24:06] Nathan Wrigley: Yeah. Okay, so there's actually some psychological benefit for you as well. You get a real nice feeling of it. Okay, that's really good.
So with the best will in the world, a university, every year there's a cohort of children, young adults, whatever it may be, whichever institution it is, and a proportion of them will work diligently and hard and they will succeed. And some others maybe not so much.
How does that work? How do you ensure that everybody gets through it? And I don't know if there's enough data to answer this question. Again, I'm doing air quotes, how is the pass rate? Do most people that embark on this get through the necessary things? Or is there a fair bit of, I don't know, discipline, for want of a better word, that needs to be applied and cajoling people to get through it?
[00:24:46] Ivana Ćirković: Yeah, so I touched base on the accountability. So we have not strict rules, but recommendations. Weekly mentor chats, async communication through Slack. They all have weekly tasks that needed to be done. So if a student don't answer the message or come to weekly mentor call three times, they are no longer WordPress Credit students. And that is the accountability.
You need to show yourself that you are willing to do the work. So if you don't care, we won't force you to do that if you don't want to. We will set reminders, we will call back, we will reach out. But if you are no show, no tell anything for three times, then evidently you are not for that. You don't wish to be there, and we won't force you to be there.
[00:25:40] Nathan Wrigley: And then in some way, are you required then to report that back to the institution and sort of say, okay, we've reached the end of the road here, and then it's for them to figure out how that impacts. And presumably the students can.
[00:25:53] Ivana Ćirković: Their grades, yeah.
[00:25:53] Nathan Wrigley: Yeah, their grades what have you, okay. Touching back on the sort of business side, because we've dwelled a lot with students and universities and we're going to stay with students, because that's really the underpinning of the whole thing. How has the business side of things, is it taking off? You were describing that it's kind of like a new thing. Have you got any sort of success stories or anecdotal evidence that people do in fact want this?
[00:26:15] Ivana Ćirković: Yeah, so it's still fairly new, so we don't have those anecdotes yet. One of the reasons why I'm here at the WordCamp Europe is to find out and to get new perspective from businesses to like reach out to them to see what they think about the program. Would they want to be evolved. And how to give tips, maybe how we can improve. So stay tuned for more.
[00:26:38] Nathan Wrigley: Yeah. And it is interesting, when you walk around an event like this, I don't have the exact numbers, but the demographic is definitely skewing older. There's not so many 18 year olds. And if this community wishes to carry on, at some point the age demographic will get to retirement age.
[00:26:57] Ivana Ćirković: Yeah. Just last night we were talking. I've been in the community for 11 years. And for 11 years all the same faces are here. And we really need new faces. But to get new faces, WordPress Credits is one part of the solution. But then again, we need to meet young people where they are. And they are not on the conferences, they are not on websites, they don't use websites, they don't care about websites. They are on very specific social media channels. And if we want to get fresh, new, young blood, we need to go there and to present what we do in a way that matters to those kids.
[00:27:35] Nathan Wrigley: In terms of success, if you were to, I don't know, let's imagine that we could cast our minds forwards five years, let's go for that. What would you like to have happened with WP Credits? Would you like, for example, to see a bunch of 20 somethings wandering around in an event like this? Does it matter that they're involved in the community and doing WordPress events and contributing to Core and those kind of things? Or is success just more broadly, people are using WordPress? You know, it's still a project. What's your take on, what does success look like in five years?
[00:28:08] Ivana Ćirković: For me, I would like to see more young people involved. Yes, we will always have users because in its core, WordPress is a very useful tool. And I'm happy to stumble upon that tool many, many years ago to use it both personally and professionally. But I really want to see young people involved in a way that we were involved 10, 15 years ago, and to see what can happen with WordPress.
I strongly believe it'll be transformed, not with AI or all other flashy trends. WordPress has always been about people. And we need new people, we need young people to get it where it needs to be.
We are getting older and don't have strengths or stamina to do so for how many long years. By having new kids, fresh perspectives, I'm really excited to see what they can come up with next.
[00:29:08] Nathan Wrigley: Yeah, it's kind of handing over the baton in a way, isn't it? Seeing what the future holds. Yeah, I definitely have concerns that the age demographic is skewing. And no matter what has happened in the past, I don't see it being backfilled with younger people moment.
But I think that's largely because we just assumed that that age demographic would fill itself, because we were excited about it, so the younger generation will be excited about it. Well it turns out the world moved on. And TikTok came along, and YouTube became a massive thing and mobile phones and all the different platforms became a thing. And so the attention was put elsewhere by many young people.
And so I suppose we needed to come up with a system where we are, in a sense, just putting it in front of their face and saying, look, it's here. You know, you're a university student, you are somebody looking for work in a small business. Here's a credible way of getting involved in something which potentially could change your life. That seems like the most credible way of doing it at the moment. And I guess we'll just have to see what the next five years brings.
In which case, is there anything that you felt you wanted to touch on that you wanted to get out of this chat before we finished?
[00:30:15] Ivana Ćirković: No, I think you did it masterfully. And we touched base on everything that needed to be said.
[00:30:20] Nathan Wrigley: Perfect. In that case, I will say Ivana, thank you for chatting to me today. Fingers crossed that your presentation goes well tomorrow, and that you pack the place out, and that by this time next week, you are extremely busy with the WP Credits program. Thanks for chatting to me.
[00:30:34] Ivana Ćirković: Thank you. Thank you for inviting me.
So on the podcast today we have Ivana Ćirković.
Ivana is a digital marketer with 18 years of experience working both in and out of the tech industry, and currently leads marketing at WPBakery. She's an active participant in WordPress events, having attended and spoken at numerous local and international WordCamps over the years.
In this episode, our focus is on the WordPress Credits initiative. We learn how this program, launched by the WordPress Foundation, connects students with real-world opportunities to contribute to the WordPress ecosystem, earn certifications, and increase their competitiveness on the job market.
Ivana discusses her own experience as a WP Credits mentor, working with students as they learn about digital marketing, remote work, and open source contributions. We explore how universities can modernise their curriculums and add real-world value for students by participating in the initiative, and how businesses can get involved, not just to support the community, but to help shape and discover future talent.
The program's evolving structure also gets attention, and we learn how students are guided through hands-on activities such as translation or documentation, and how their progress is tracked publicly via profiles on WordPress.org. Ivana shares the opportunities and challenges for both educators and businesses, with thoughts on accountability, mentorship, and the need to bring new faces into the WordPress community.
If you're interested in the future of WordPress, education, or bridging the gap between academia and industry, this episode is for you.
Useful links
What it (really) means to be a part of the WP Credits program?
01 Jul 2026 2:00pm GMT
Open Channels FM: BackTalk on Support, Decision-Making, Reputation and Risk
Insights on community support, decision-making, starting new projects, and the importance of agency reputation in hosting. Engage and share!
01 Jul 2026 1:11pm GMT